
Please forgive me, I couldn't resist using a couple of "sea-inspired" puns to get your attention. Now that I have it, I can't wait to share the March Bonus Formula with you! Tricia has outdone herself with another awesome layout idea - this time adding some circular elements for a whimsical, water-inspired feel.
Members: Have you downloaded your March 2022 bonus formula yet? Be sure to do so before the end of the month. Not sure where to find it? Check your inbox for your member-exclusive email with important links to the bonus formula, instructions, video tutorials and more. It is sent to active members* on their scheduled shipping day and looks like this:

*An active member is defined as one who paid for and received the current monthly kit.
Under the Sea Layout Sketch

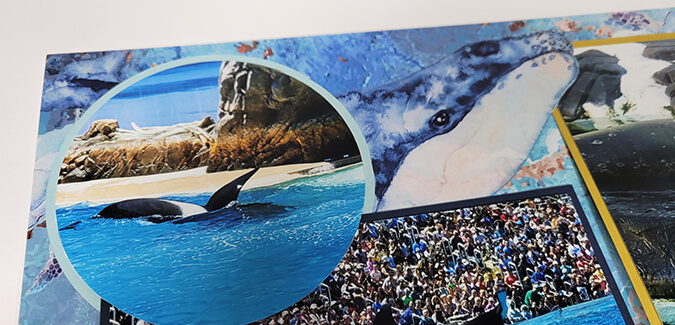
Use a circle-cutting tool or dies to cut circles from Paper C. (You could even trace plates or glasses if you had to.) The finished layout holds at least seven photos.
Assembled Layout - Karen
Before Photos
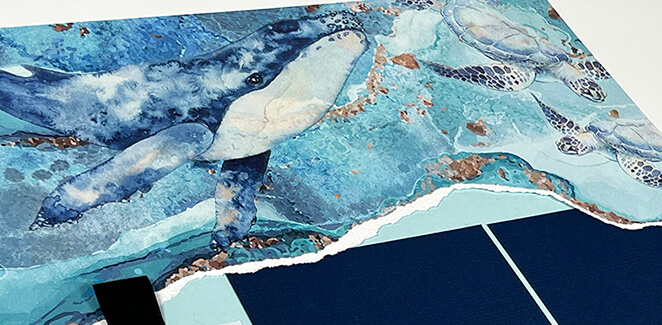
I thought I'd try something a little different this time: Instead of two Paper D being the same, I used two different papers for the left and right bases of the layout. To copy this idea, use the following paper assignments: Sea Green (Paper A), Deep Blue (Paper B), Aqua (Paper C), Whale Print (Paper D-left) and White Plain (Paper D-right).

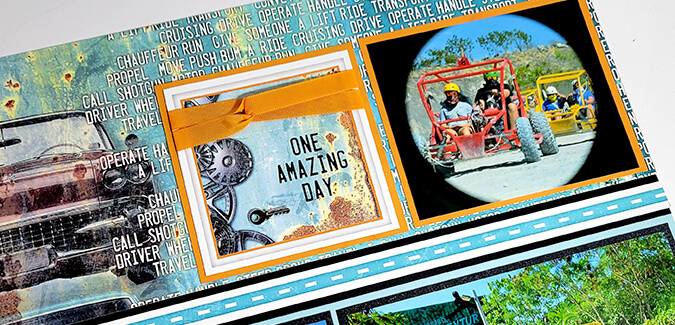
I couldn't bear to hide the whale, so a bit of craft-knife magic brings him to the foreground. For a touch of shimmer, add a length of aqua metallic ribbon to the border on the right page. Tie a smaller piece onto the narrow paper strip the left for balance.
Finished Layout

The two-page spread showcases photos from our 2019 trip to Sea World in San Diego.

The "You're a star!" cutapart and a puffy starfish embellish the left side of the spread.

While you have that circle-cutting tool out, why not trim some photos, too?

Adding photos to some of the round shapes adds a fun element and is a great way to sneak in even more pics.

A cutapart journaling box and laser cut shell (from the Card Kit) accent the right page.
Assembled Layout - Tricia

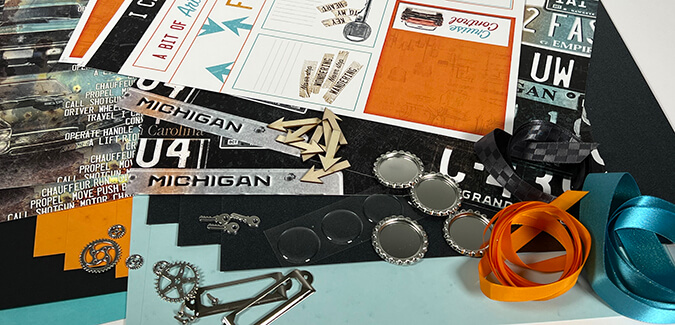
To recreate Tricia's layout, use the following Under the Sea papers: One each of Sea Green (Paper A), Aqua (Paper B), Card Kit Print (Paper C), and two Deep Blue Plain (Paper D). Cutaparts create a page title, an accent, and provide a place for journaling.
I hope our finished page samples inspire you to create layouts of your own using this sea-riously awesome formula. If you do, be sure to share them on our Club Scrap Chat Facebook group so you can inspire others!
Happy scrapping!