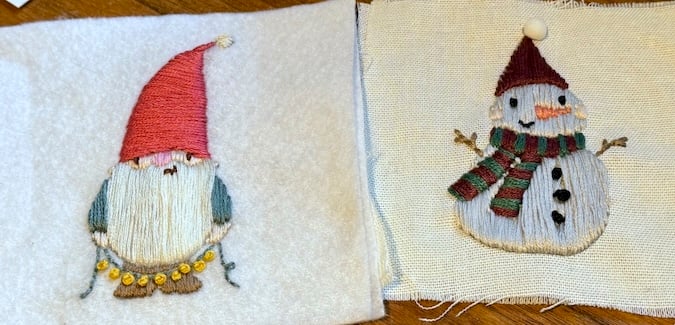

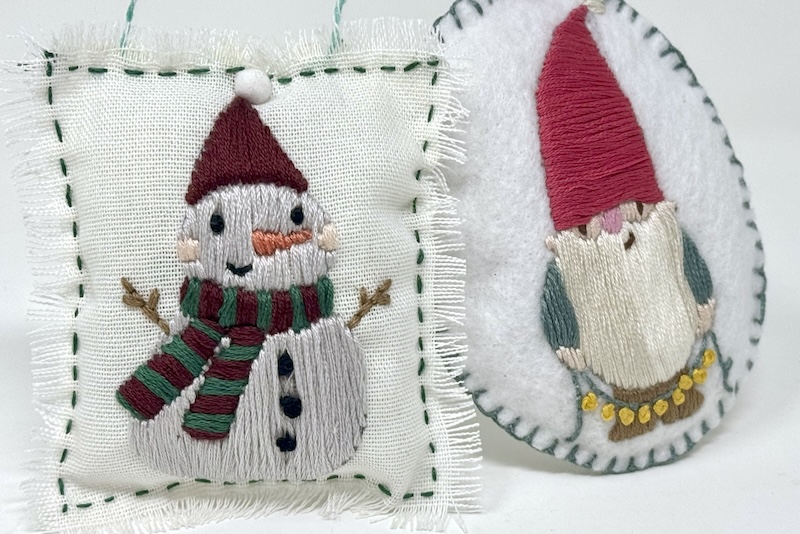
Create adorable embroidered ornaments just in time for the holidays with the Stitched Stamping Technique. The ornaments below feature super sweet Gnome for Christmas Stamp images.
Stitched Stamping Technique
Snowman Ornament
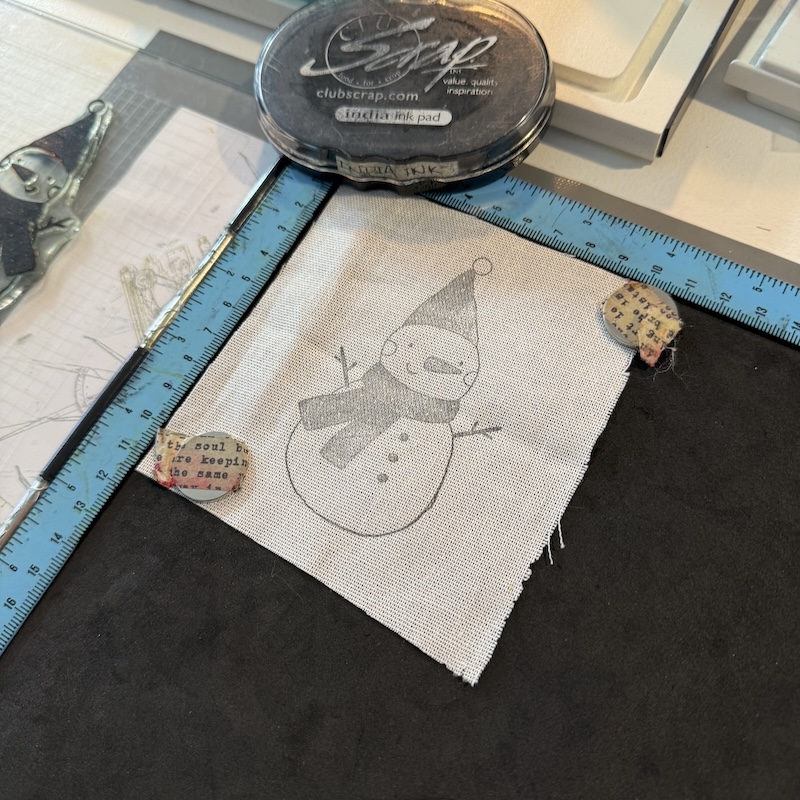
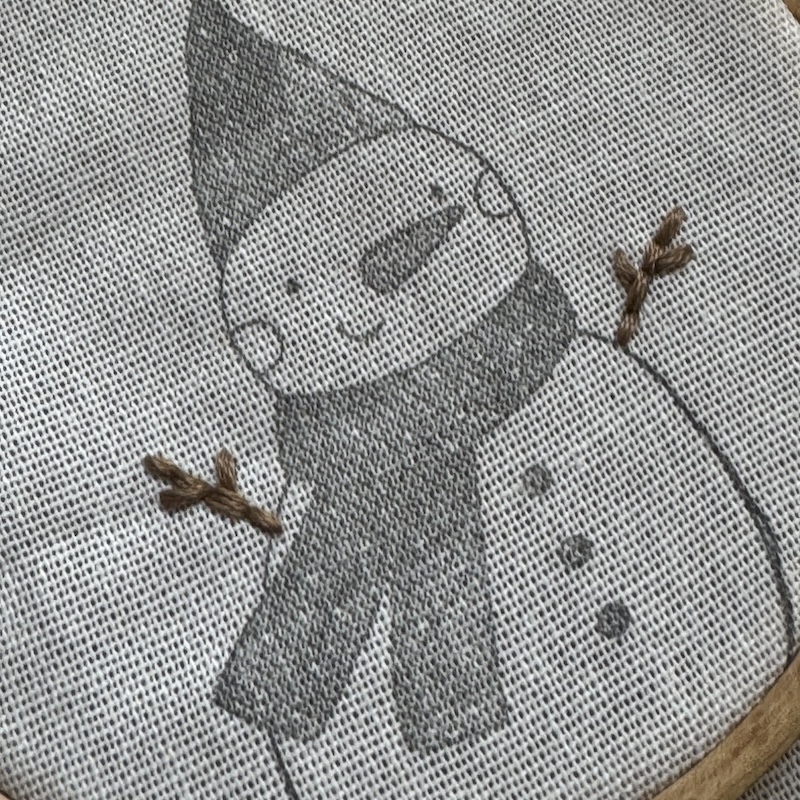
Gather pieces of fabric or felt. Place the the fabric "panel" into a stamping platform. Position the snowman image stamp over the fabric.
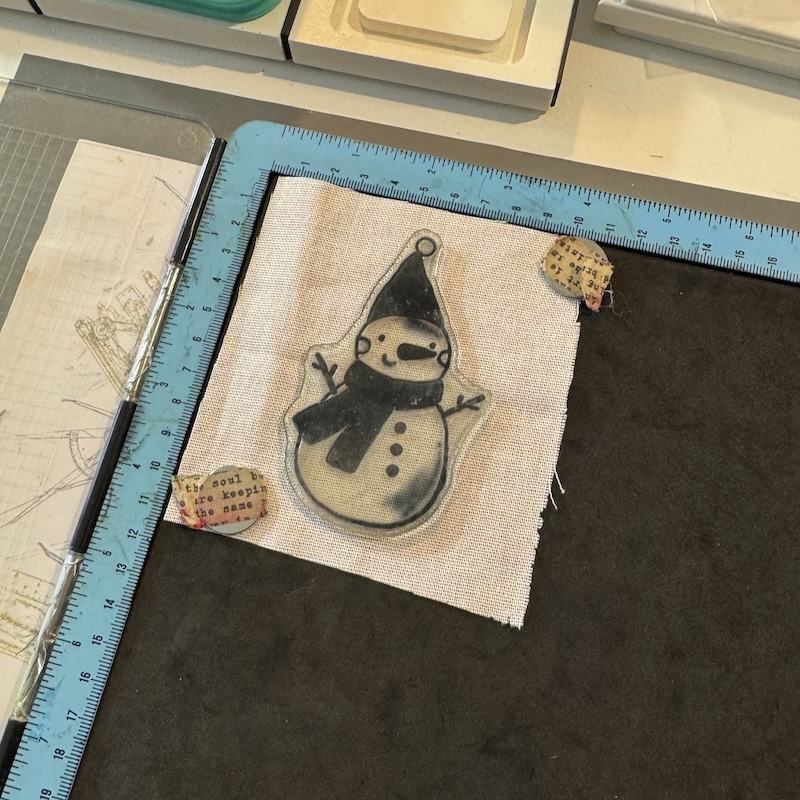
Close the lid to pick up the stamp. Open the lid and apply India ink to the snowman. Close the lid again to transfer the image to the fabric. Repeat as necessary to achieve a clear image.
Remove the fabric panel from the platform and place it into an embroidery hoop.

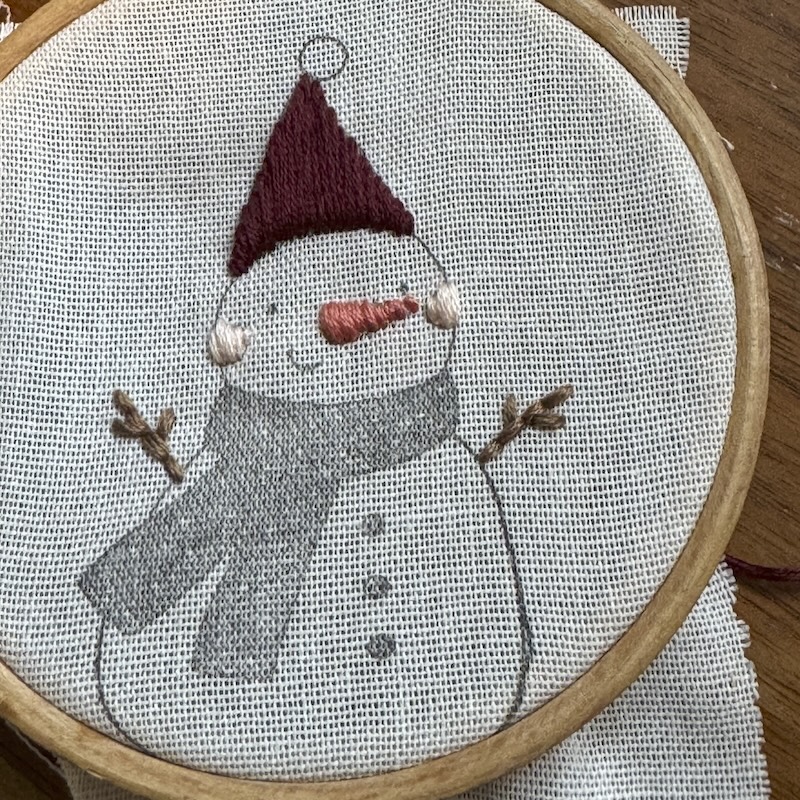
Choose floss that coordinates with your desired color palette.
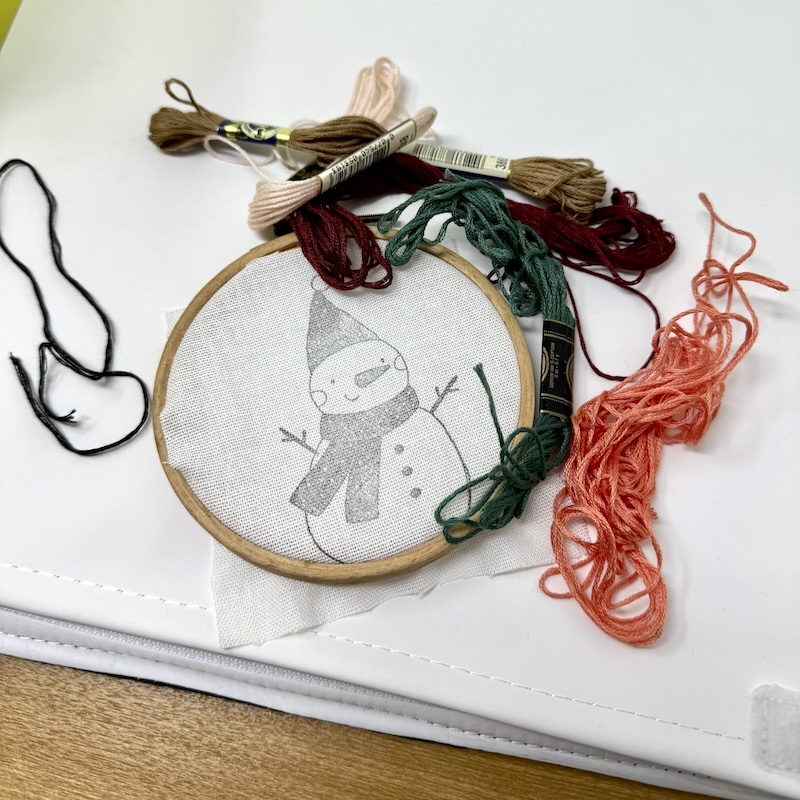
Embroider the stick arms with brown floss using a back stitch.
Fill in the other stamped areas with floss using a basic satin stitch.
Continue adding floss in a variety of colors to fill in the scarf and body.
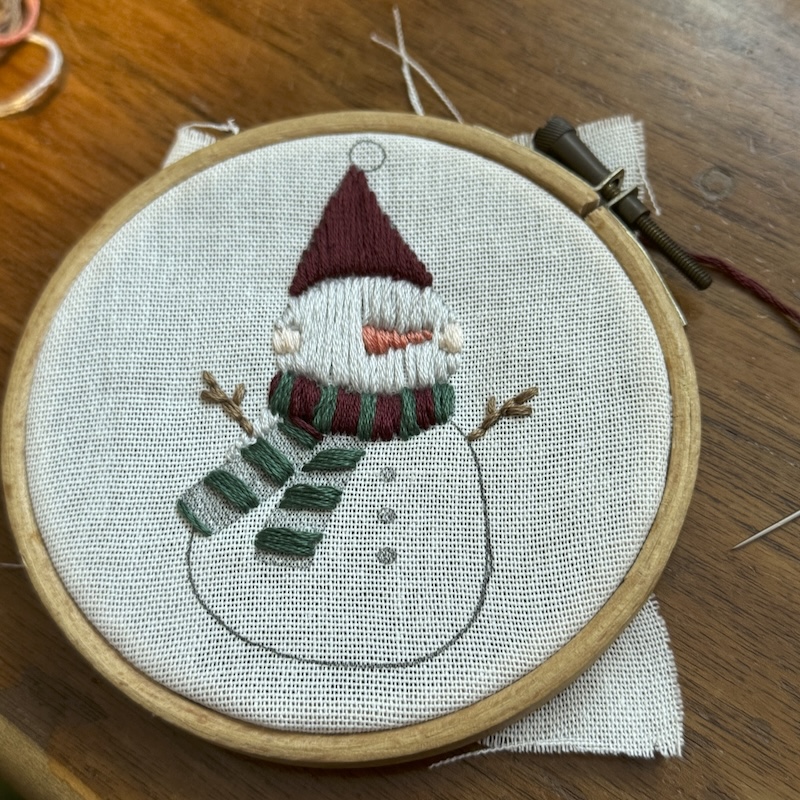
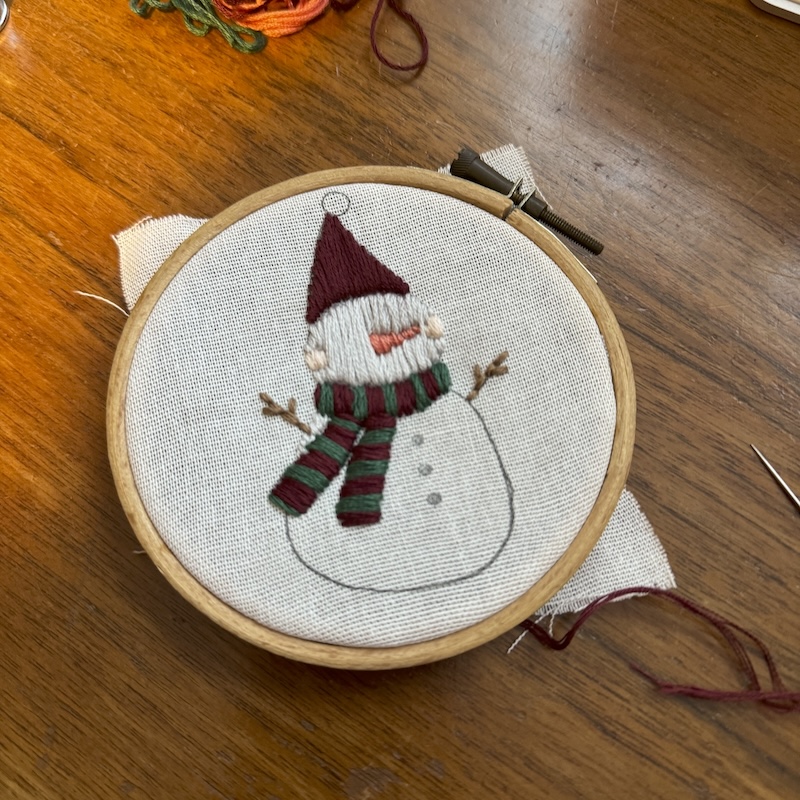
Add black floss tied into French Knots for the eyes and coal buttons.
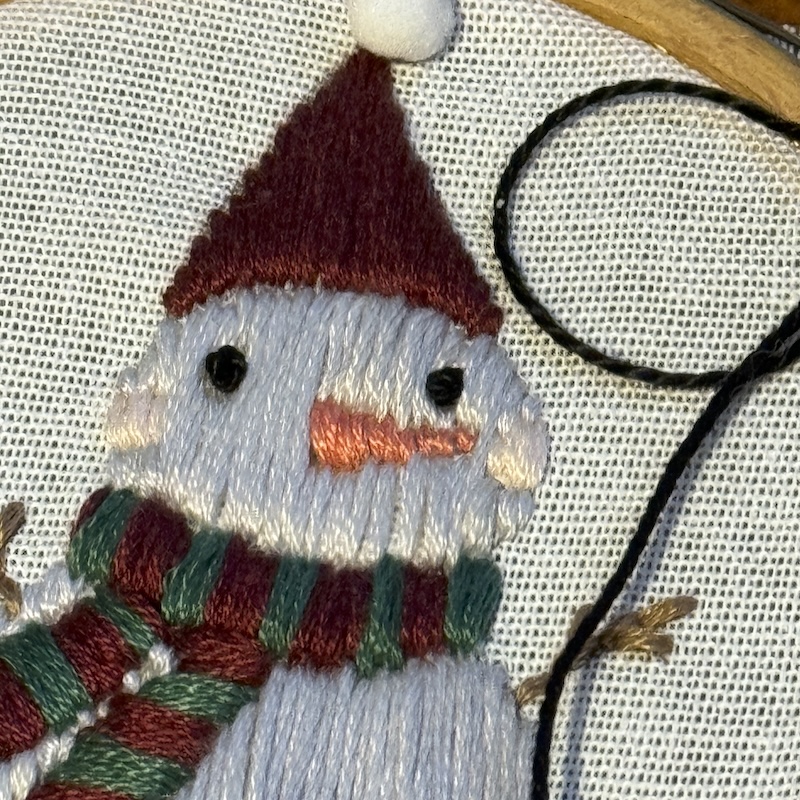
Add a small smile with a back stitch.
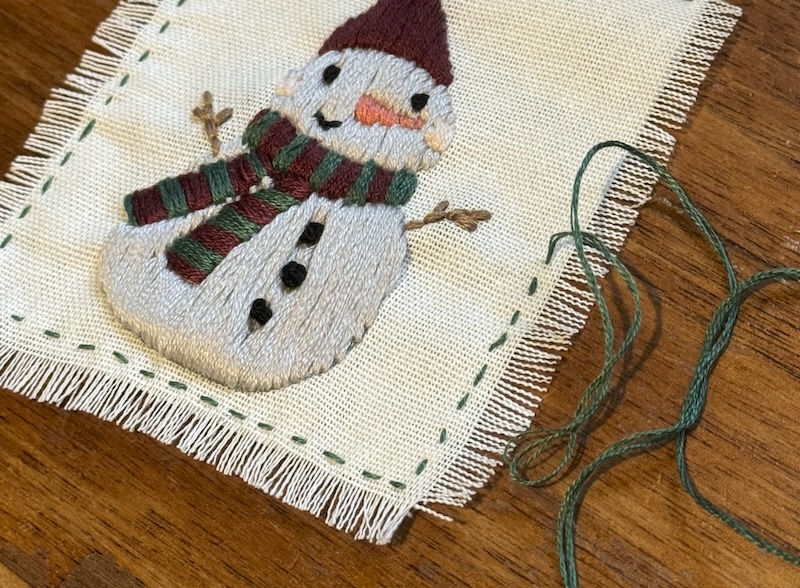
Remove the snowman from the hoop. Place a second piece of fabric beneath the first and connect the two pieces with green floss using a running stitch. (Be sure to leave a small opening at the top of the ornament.)
Stuff a small amount of poly-fiber fill into the opening.
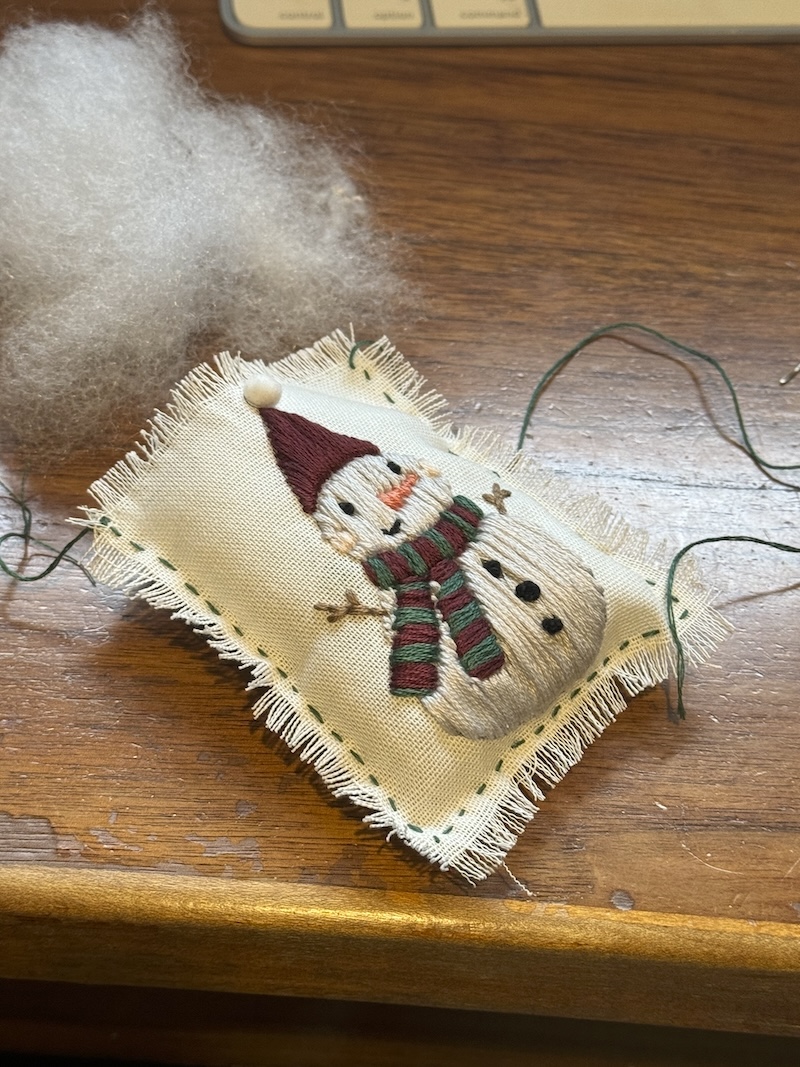
Trim a small length of baker's twine and insert the ends into the opening. Close the top of the ornament with running stitches.
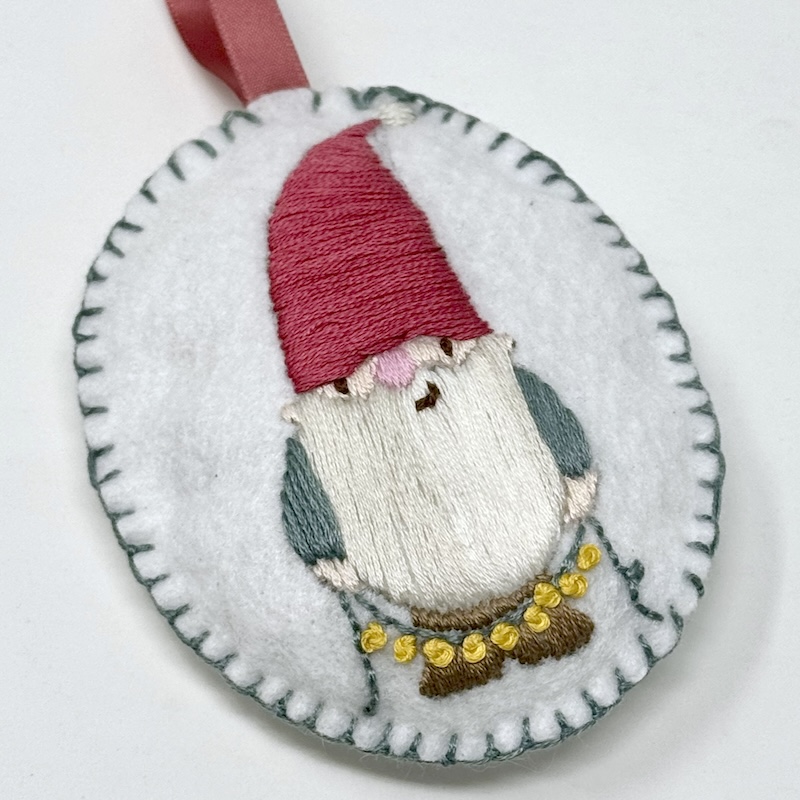
Gnome Ornament
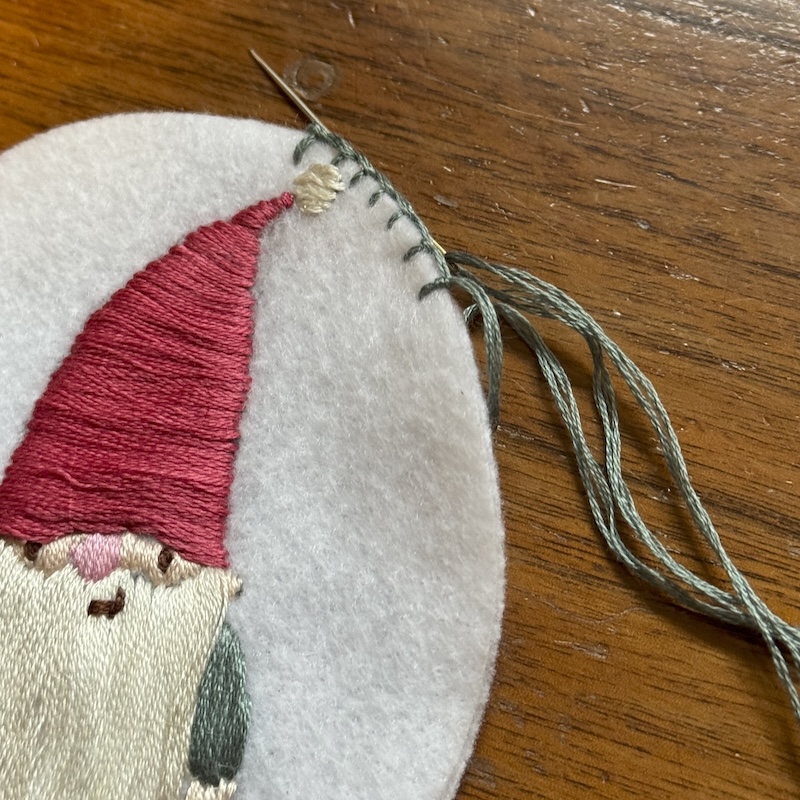
Use the steps above to stamp the gnome onto a piece of felt. Once stamping is complete, remove the felt from the stamping platform and place it into an embroidery hoop. Gather embroidery floss to coordinate with your desired color palette. Fill in the largest areas of the image with satin stitches. Back stitch the string lights with green floss. French knots and yellow floss mimic the light bulbs.
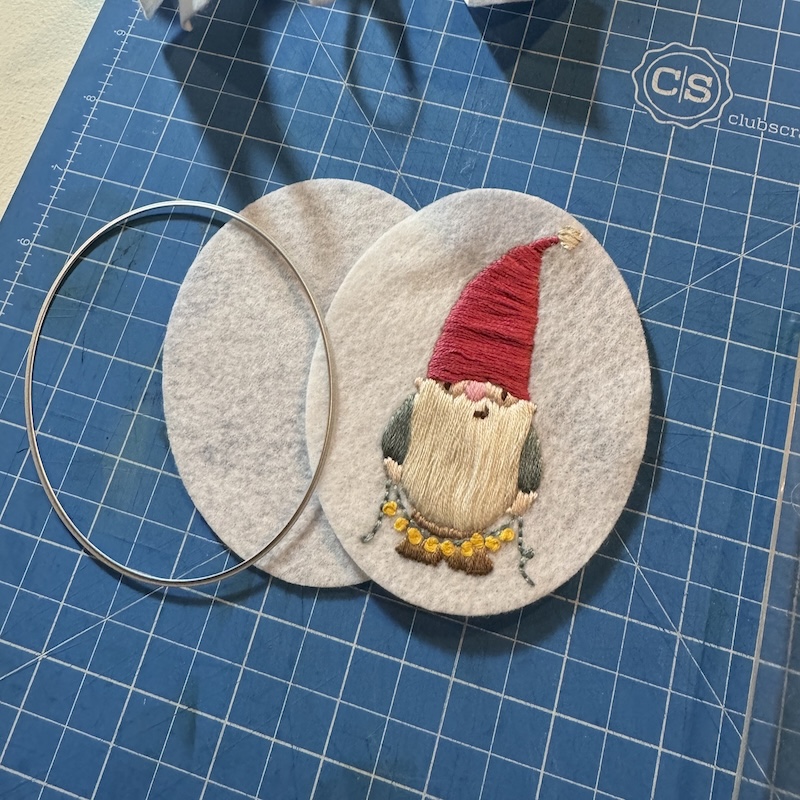
Die cut the stitched panel and a plain piece of felt into an oval shape. Layer the two pieces together and perform a blanket stitch around the perimeter to connect them.
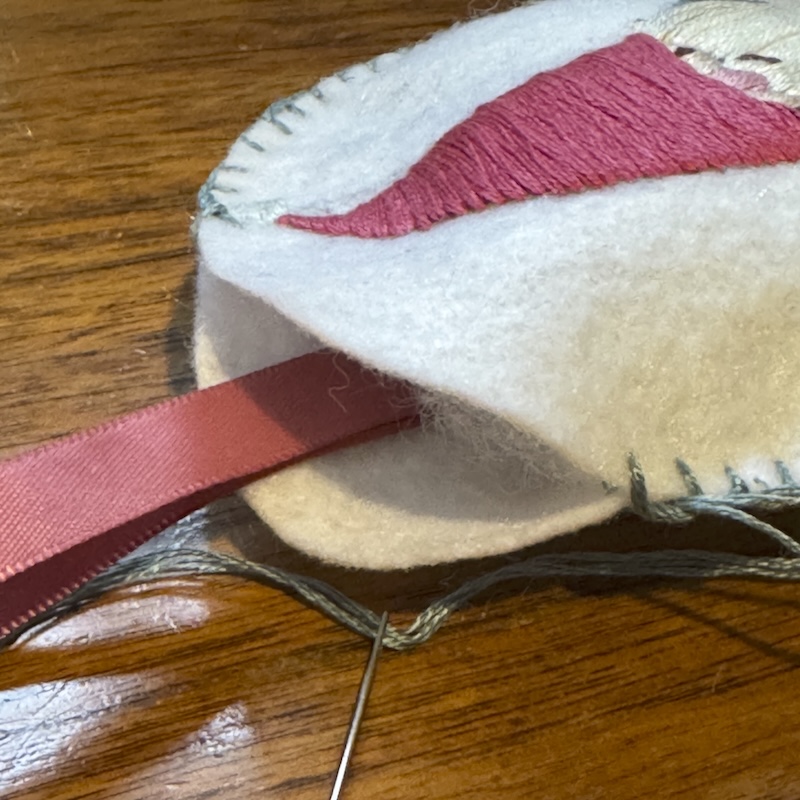
Leave an opening at the top of the ornament to add a small amount of poly-fiber stuffing.
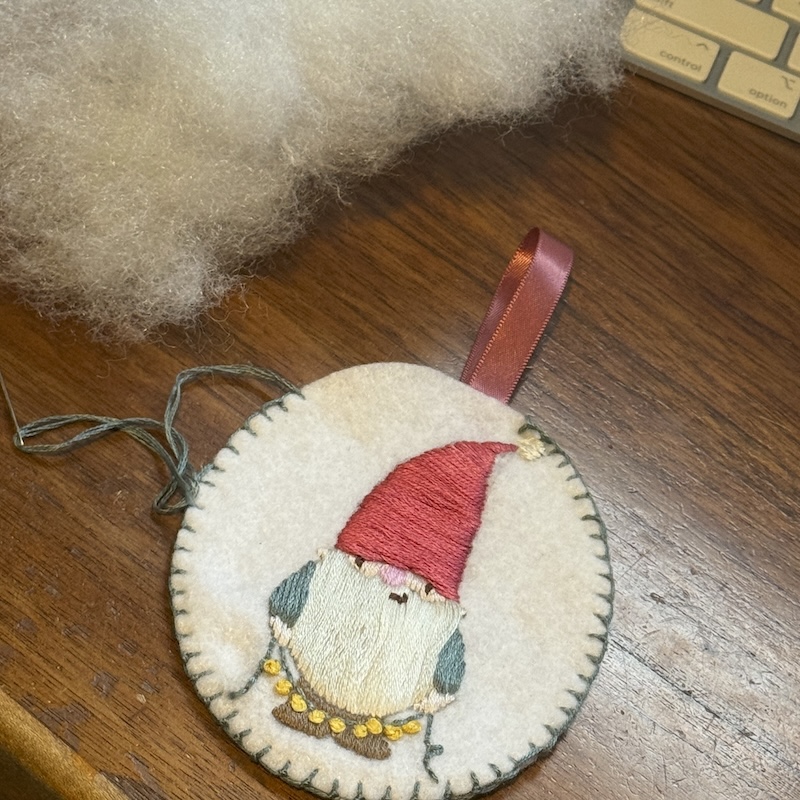
Insert a small piece of ribbon to between the layers of felt; secure with the blanket stitch.
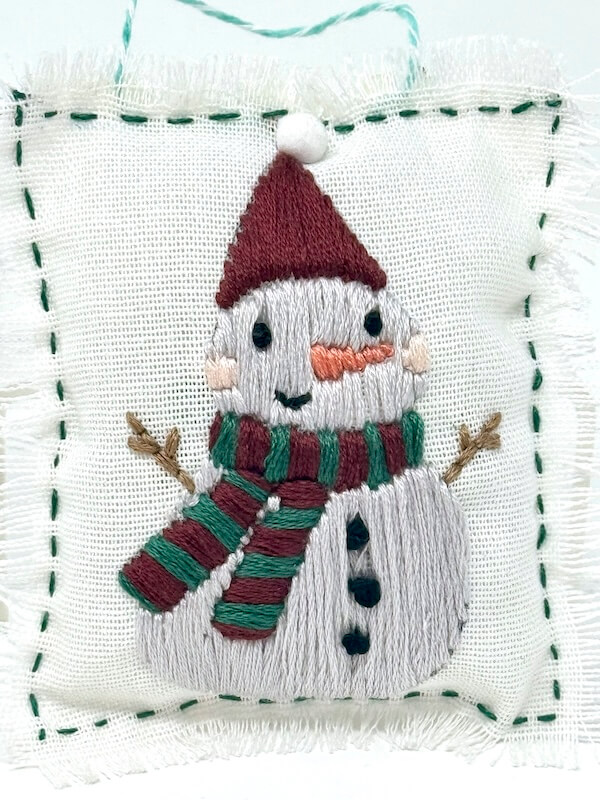
Let's take a look at the finished ornament.
Who wouldn't love to adorn their holiday tree with these adorable ornaments? Make a batch for quick holiday gifts or stocking stuffers for your loved ones.
Looking for even more Stitched Stamping ideas? Visit the blog posts below for additional inspiration.
Sunflowers Coin Envelope Mini Album
Crewel & Unusual Wall Hanging
I hope you'll give this technique a try. With so many stamp sets available from Club Scrap, the possibilities are endless!

Stay tuned for more inspiration as we celebrate "12 Days of Holiday Gift Ideas" on the blog this month.
Happy holidays!
India Ink Pad
$7.50
Club Scrap's India Ink is a deep black, super-quick drying dye ink formula for use with watercolors, markers, stamping, scrapbooking and much more. We love how fast it dries so that you can get to work without a smudge!… Read More