
Scandinavia Lite ships today, and she's a beauty!

I always like this extra opportunity to share additional details about how I put the pages together. (And don't forget to download your page assembly instructions.) Let's take a look!
Scandinavia Lite Layouts
LAYOUTS 1 & 2

The green double-faced satin ribbon is perfect for a three-part bow. To create one, cut a piece of ribbon long enough to wrap around the cutapart. Cut an additional piece about 6" in length and tape the ends together to form a loop. Trim a 2" piece and wrap it around the loop and base ribbon to create the bow. Secure the ribbon on the back with additional tape and add the bow to your project. (Watch this video at the three-minute mark to view the steps.)

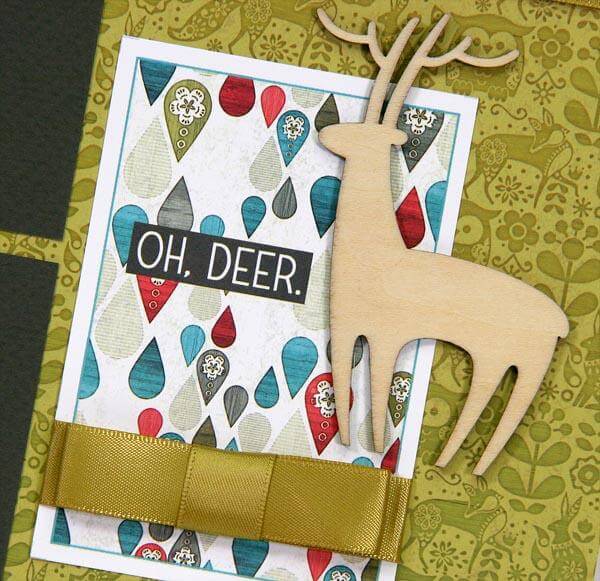
LAYOUTS 3 & 4

Oh, deer. It's another three-part bow. But isn't it sweet with that adorable woodcut deer? Adhere the deer with our wonderful Bookbinding Glue. It's seriously the best stuff ever.

LAYOUTS 5 & 6

I love bringing a printed element into the foreground with a simple trick. Temporarily position the horizontal pink/black nested border where you want it to be, and mark the spots where the edges of the border meet the edges of the flower. Remove the border and use a craft knife and cutting mat to cut the edges of the flower to make two slots. Thread the border through the slots and . . . foreground magic.

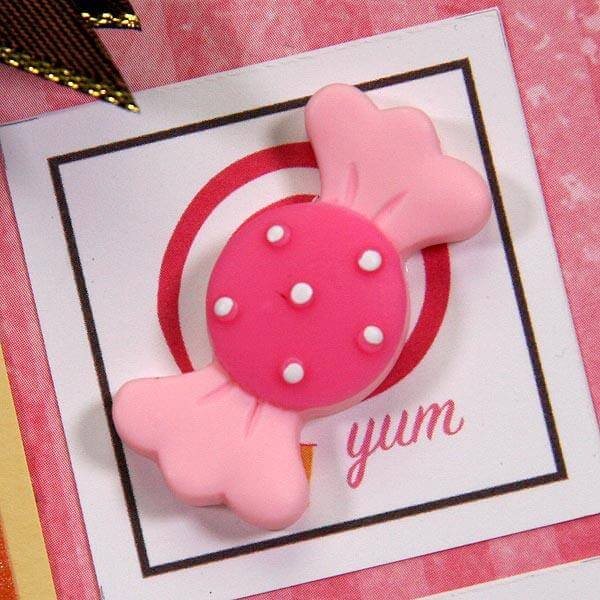
You'll receive a sheet of these luscious sparkle dots.

With so many circles on the artwork in the kit, you'll find many homes for them! I find the best way is to remove them from the sheet with the tip of a craft knife and transfer them to your project. Using your fingertips can get a little squirrely. You may find the dots on your sweater at night while brushing your teeth.
Tie two pieces of pink twill around the horizontal border strip for a sweet accent.

LAYOUTS 7 & 8

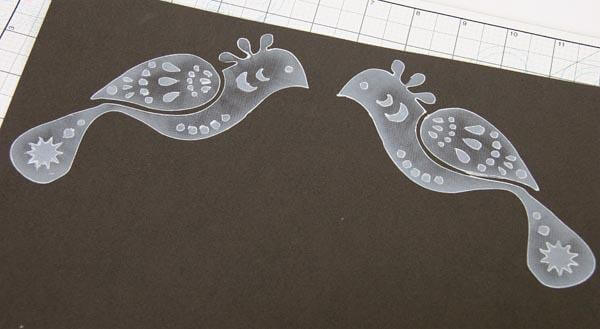
This Scandinavia Lite Bird Stencil is so cool!

Stencil the "body" of the bird onto the upper right corner of the 12x12 Gray paper with White Pigment ink and a CS® Ink Applicator. The primary ink application should be around the outside edges of the bird shape. Next, align the decorative elements onto the bird and fill in the openings with a generous amount of white pigment ink. Finally, dab metallic cream chalks, pastels, or another favorite art medium to add color to the elements.

Come back tomorrow for more stenciling ideas from Kay! See you then!
Tricia