
Create simple, yet colorful backgrounds for cards with the Rolling Marbles Technique. Pair the finished panels with your favorite stamp sentiments for quick and easy-to-make greetings. Don't worry if you've lost your marbles, large round beads work great for this technique, too! Let's get rolling!

(The finished size of each card below is 4.25x5.5", unless otherwise noted.)
Rolling Marbles Technique
Gather:
CS® Hybrid Re-inkers
Shallow box or tray
Non-stick Craft Sheet (or other non-porous material to line your box/tray)
Marbles (or large round beads)
Line a shallow box or tray with a nonstick craft sheet. Squeeze a small amount of Mahogany, Sandstone and Leaf Re-inker onto the craft sheet. Place a white 4x5.25" panel in the bottom of the box.

Place several marbles or beads into the tray and begin rolling them around the box. They should roll through each of the ink puddles and across the panel several times.

Continue rolling the marbles around the box until the desired look is achieved. Carefully remove the paper from the box and set aside to dry. Remove the marbles (or beads) and clean them thoroughly. Wipe away any excess ink from the craft sheet.

Create a second background panel by adding Red, Yellow and Sapphire Re-inker to the non-stick craft sheet. Place a clean white panel in the bottom of the box.

Add the marbles and repeat the steps above until you are pleased with the result. (I love how the colors started to blend a bit to create new colors!)

Remove this panel from the box and set it aside to dry.
Once the panels have dried completely they can be transformed into fun cards!
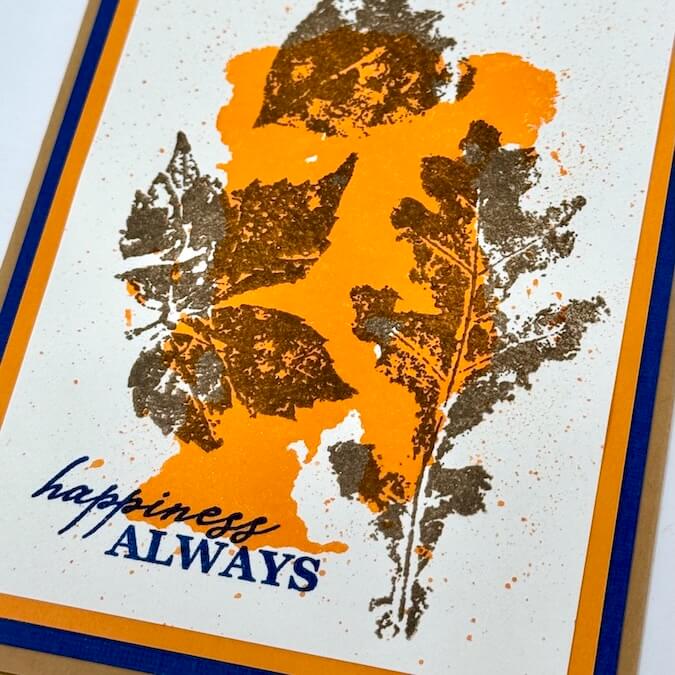
Vines Card - Julie

Pair the first background panel (Sandstone, Mahogany and Leaf Re-inkers) with papers and stamped sentiments from the Vines collection.
Harbor Town Card - Julie

Adhere the second panel created above (Sapphire, Red, Yellow Re-inkers) to a Green card base. Stamp the boat image, color with pencils, and die cut with a circle die. Mat with a Red die cut scalloped circle. Finish the card with a stamped sentiment and enamel dots. (Most materials are from the Harbor Town 07.24 collection.)
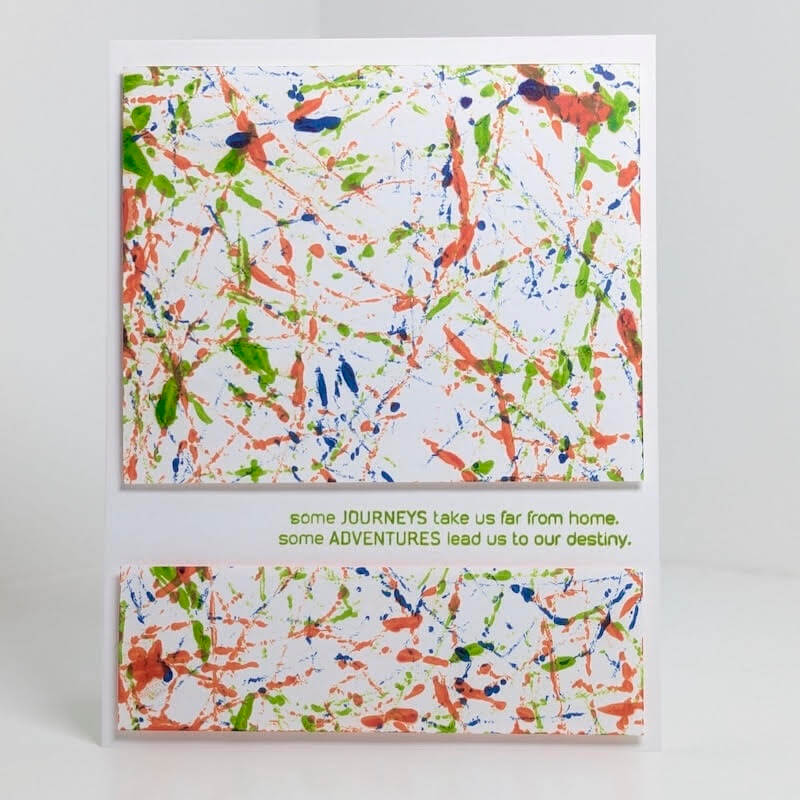
Lisa created two background panels with Tangerine, Sapphire, and Peridot (no longer available) Re-inkers.
Card #1 - Lisa

Lisa "visually" divided the background panel with a white die cut strip stamped with a Harbor Town sentiment in Tangerine ink. Adhere it to the card with foam adhesive circles to add a bit of dimension. Top with a die cut word for a quick and easy card.
Card #2 - Lisa

Trim the background panel into two sections, adhere to a white card base with dimensional adhesive. Center the Harbor Town sentiment between the panels and stamp with Leaf ink.
Will you try this fun technique? We invite you to share your finished artwork on our Facebook Chat Group! Not a member of the group yet? Simply answer a few questions and we'll get your request processed in no time. Keep on rollin'!

CS Hybrid Re-Inkers

$4.40
Rejuvenate your ink pads with our re-inkers! Exclusively Club Scrap®, this hybrid craft ink combines the most exceptional ingredients of both pigments and dyes for a fine, crisp, fast-drying images. .5 US fl. oz. Use alone or with our ink… Read More
Harbor Town Stamps

$19.25
Our premium clear photopolymer stamps are ready to use; no prep is required. The stamp sheet measures 6x8" and includes individual eleven images and phrases. Deeply etched for high-quality impressions Clear substrate for easy positioning and accurate stamping Non-yellowing and… Read More
Vines Stamps

$19.25
Our premium clear photopolymer stamps are ready to use; no prep is required. The stamp sheet measures 6x8" and includes eleven individual images and phrases. Deeply etched for high-quality impressions Clear substrate for easy positioning and accurate stamping Non-yellowing and… Read More