
I've been catching up on trimming and assembling some of my past card kits - most recently, Celebrate Remix. After completing the cards, I realized I really liked the formula - two of the twelve cards featured a fun Z-fold design. I decided to repurpose this set of instructions to make cards from Club Scrap's Pure and Simple Remix.
Pure and Simple Remix Cards

Since the Celebrate Remix Card Kit included more plain paper color options than Pure and Simple, I chose to add one 12x12 Gray Plain from the original 2009 Pure & Simple collection. It's always a bonus when I can use up something from my stash!
When repurposing instructions from a different kit, I find it best to write down my paper substitutions prior to beginning the trimming process. (This also helps when it comes time for assembly.) Once all the papers are cut, filed and assigned to the appropriate card style (A, B or C), I look at the Cutaparts to decide which pieces will be used on each card. I always do a "dry run" - nothing is glued down until all cards are laid out, just in case I have to make adjustments along the way. The Pure and Simple artwork on the printed papers and Cutaparts adds so much to the overall design of the cards!
Set A - 4.25x5.5" Cards
Card Set A features two Z-fold and two standard folded cards.

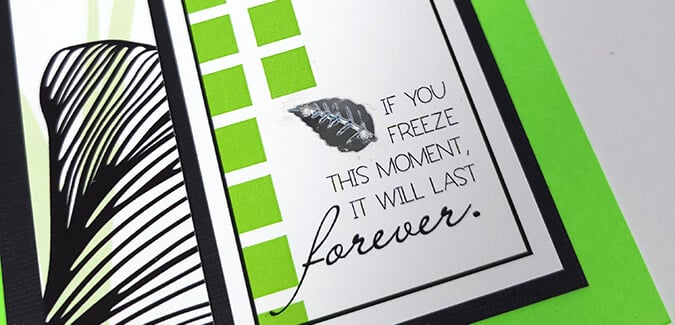
The two Z-fold cards feature 2” banner strips from the Pure and Simple Cutaparts in lieu of the 1.75” strips created when you follow the cutting instructions.

I also added a 4x5.25” gorgeous gray print panel to the card above (Pure & Simple 2009 collection).

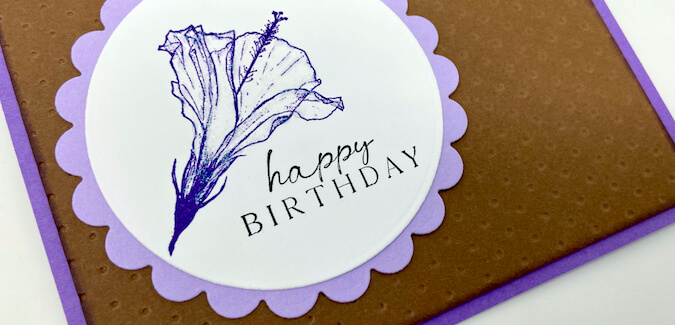
The remaining two cards used only the card bases from the formula. The smaller nesting panel on the Hope card is from my stash (Pure & Simple 2009).

Nest the Disney Cutapart onto the green mat. Tie a ribbon bow, adding a black tag and silver leaf as accents.
Set B - 3.5x5" Cards

The "Follow Your Bliss" border strip is used instead of the paper strip/washi tape combo shown in the instructions. Die cut "Hope" using a circle die; attach with foam adhesive for dimension. Embellish with black tag, silver leaves and a black ribbon bow.

Trim the floral cutapart along the stem, flower and border artwork. Adhere to the card with adhesive on only three sides. Fashion the "Shine Brightly" Cutapart into a tag, add ribbon and tuck into the opening. Finish with a green bow.

The printed card base was so beautiful I hated to cover it up. Attach the round "Wish" Cutapart using foam adhesive layered over a small black panel embellished with green ribbon and three silver leaves.

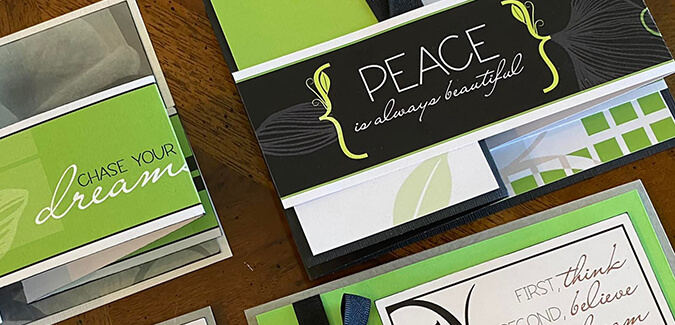
The "Peace" card features a shape cut using a die from my stash. I thought it was the perfect compliment to the images on the Pure and Simple prints.
Card Set C - 5x7" Cards

I kept this card simple by adding only the 3.5x7" Cutapart to the front, along with a narrow strip of black paper embellished with three adorable little flower sequins.

The next three cards closely follow the samples in the Celebrate Remix instructions. The .75 and 1” wide Cutapart border strips work perfectly as a finishing touch. While it is subtle, the round "Peace" Cutapart perfectly compliments the circle artwork on the printed background panel.

The nature of the Pure and Simple artwork makes designing each card easy!

Ink was added to the edges of some panels. Use foam adhesive to add dimension to the "Enjoy the little things" Cutapart and tag.
The result of my experiment is twelve beautiful greeting cards created from the Pure and Simple Remix Page Kit, plus enough scraps left to make a few more. Why not try reusing a past (or downloadable) card formula with your favorite special release kit? You'll be glad you did!
Cathy