
There is so much to celebrate! The Hooray Page Kit features a colorful and cheerful color palette and festive artwork, but I'm here to tell you - it's not just for birthdays!
Each month, I follow pretty much the same routine: After the trimming and dry-fitting, I assemble the pages using Tricia's samples as a guide. When adhering mats, I use just a small bit of adhesive, allowing me to rotate and move them if needed. Then it's time to grab photos and get to work!
To better illustrate the process, I'll share the "nekkid" pages (as designed by Tricia) first, followed by my personal layouts - complete with photos and journaling. I'll also share the tweaks I made along the way.
Hooray Page Kit
Layout 1 & 2
This first two-page spread has room for four (or more) photos.

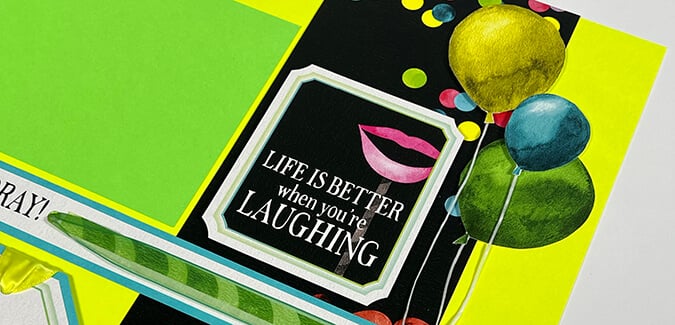
Sometimes the layout of the photo mats needs to be adjusted to fit the occasion. In this case, the photo I wanted to feature on the right page was vertical, rather than horizontal. Rotating the photo mat 90 degrees does the trick! Relocate the journaling tag cutapart. Thread the blue/green ribbon through and wrap it around the back. (NOTE: The "laughing" cutpart was more appropriate for a later layout, so I didn't use it here.)

Rather than use the candle cutapart as a "tag", flip it to the plain side. Trim a matching white plain panel and nest each onto the blue panels. Trim a horizontal photo to 5-5/8 x 3.75 to span the space created by both mats.

Layout 3 & 4

I made only a few minor changes to this spread.

On the left, since the photos were more "celebrate" than "birthday", I shifted the "special occasion" cutapart down to cover the party hat and cupcake artwork.

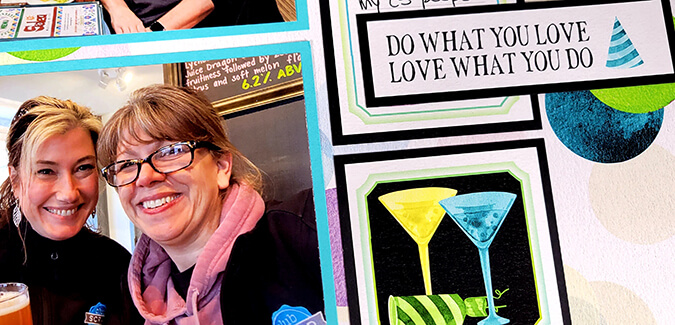
On the right, mat the "do what you love" cutapart in black (Hooray Pack of Panels), and layer onto the journaling cutapart.

Layout 5 & 6

On the left side, flip the un-trimmed "confetti" cutapart to the plain side, nest onto yellow (Hooray Pack of Panels) and use to mat a vertical photo. On the right, flip the cake cutapart tag to the plain side and top with a 2.75" square photo.

Layout 7 & 8

I made only minor changes to this spread.

On the left, add a 3x3" photo and mat in place of the cake cutapart.

On the right, stencil "Hooray" three times, instead of balloons. The "laughing" cutapart finds its new home on the right page.

There you have it: Pages completed and ready for the scrapbook by the 4th of the month. The whole process took me under 2 hours!
Now it's your turn! The challenge? Complete the Hooray Page Kit before month's end and share your finished pages on the Club Scrap Chat Facebook Group.
Happy scrapping!