
Create hexagon border strips from the die cut negative spaces left over from the Hexagon Prints Background scrapbook page.

It is very hard for me to throw anything away, let alone the gorgeous printed papers from the Let It Bee collection. I knew right away that these papers would make the perfect border strips for my layouts.
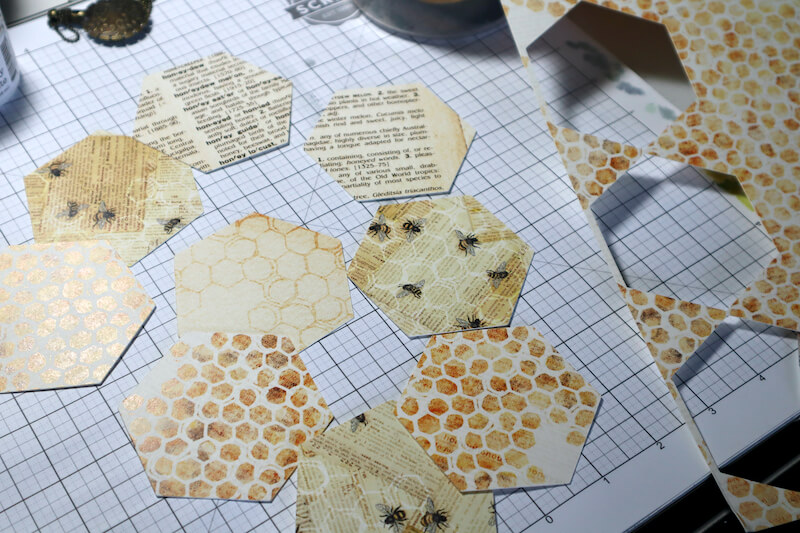
Gather two 12x12 Gold background papers and trim the die cut negative papers into 3x12" strips. Cut 1-1/2x12 strips from the die cut Honeycomb and Card prints for anchor strips on each page. Layer all the print border strips with Ivory Linen mats.

I chose photos from a visit with my friends Fran and Mike in 2019. We had so much exploring the trails at the Salt Pond Visitor's Center at the Cape Cod National Seashore. The color palette in this collection complemented the colors of the vegetation and surrounding marsh areas.

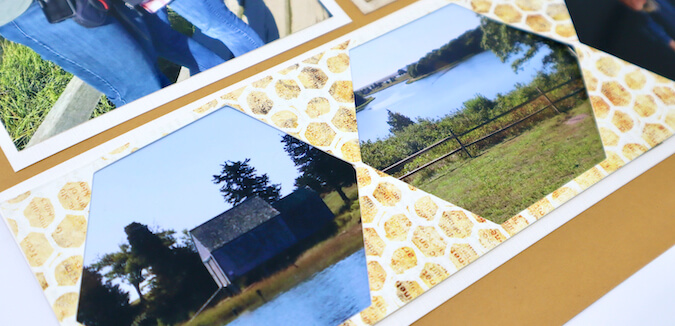
Crop photos to 2-3/4x3" and slide them behind the hexagon windows created by the die cuts. The jar tag serves as the perfect spot for handwritten journalling. The charm and ribbon add a sweet finishing touch.

Tie matching ribbons and the honeycomb charm around the border strip on the right page for a cohesive look.

Layer additional photos on Ivory Linen mats from the Pack of Panels.

Trim the Let It Bee Card Print in 1x1" squares and layer with handmade paper from the Card Kit.

Let's take another look at the finished pages.

I hope you will take another look at your die cut left overs and turn them into something new.
Happy Cropping!
 Julie
Julie