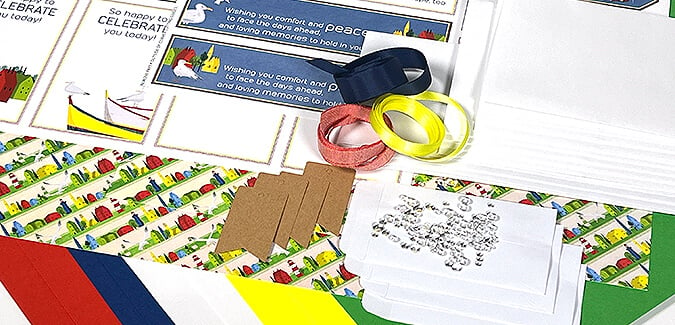

Create eight super simple cards when you pair Harbor Town Stamps with the bright and bold papers from the July collection.

Just for fun, I added an embossing technique, coloring with alcohol markers, and white gel pen to highlight these adorable stamped images. You could certainly skip these steps and still make awesome cards. Grab your supplies and let's get started!
Harbor Town Stamps

(The finished size of each card below is 4.25x5.5", unless otherwise noted.)
Card 1

Stamp the houses onto a Red panel with White Pigment Ink.

Stamp the seagull on a white panel in India Ink.

Die cut a scalloped circle from a Blue panel. (Set the shape aside for use in Card 7.) Stamp a sentiment in Sapphire Ink on a White scrap and center within the opening left by the die. Fussy cut the seagull and adhere with Bookbinding Glue dispensed from a Needle-tipped Applicator.

Wrap the bottom of the Blue panel with bright yellow twine as a final embellishment to complete the card.

Card 2

Dust a Blue panel with anti-static powder.

Stamp the houses near the top of the panel with Watermark Ink.

Sprinkle the still-wet image with white embossing powder.

Melt the powder with a heat tool.

Repeat the embossing process for the sentiment. Wrap a yellow cord around the bottom of the panel and tie in a simple knot.

Shaker Sequins (Tropicale 11.21) provide the perfect finishing touch.

Card 3

Add the harbor image to the center of a White panel with Ash Ink. (Leave the stamp on the stamping platform to make a second impression after the image is colored.)

Color the images with a variety of alcohol markers.

Place the colored panel back into the stamping platform and apply India Ink.

Close the lid over the image to transfer the ink. This technique really makes the details pop!

Remove the harbor scene stamp and replace it with a sentiment stamped with India Ink to complete the card.

Card 4

Die cut a small circle from White paper.

Adhere a small Blue panel over the bottom of the circle with Bookbinding Glue dispensed from a Needle-tipped Applicator.

Reposition the die over the white circle and cut with the attached Blue panel.

Stamp the boat image with Sapphire Ink onto the circle positioned above the Blue portion.

Color the image with red alcohol marker. Punch a 1" circle from a Yellow scrap.

Add texture to a Red panel with a Swiss dot embossing folder. Mat with Yellow. Stamp the sentiment onto a small White scrap with Sapphire Ink. Cut a swallowtail shape in a Yellow strip and adhere the sentiment to complete the card.

Card 5

Stamp the harbor image onto a White panel with India Ink. Add the sentiment with Red Ink.

Color the image with alcohol markers. Wrap the ends of the White panel with green baker's twine.

Add Shaker Sequins (Tropicale 11.21) for a finishing touch.

Card 6

Adhere a 1x5.25" Green strip to a 4x5.25 Blue panel with Bookbinding Glue. Add a Swiss Dot texture with an embossing folder.

Stamp the houses onto a Yellow panel at an angle with Ash Ink.

Color the roof of select houses with a White Gel Pen.

Stamp the sentiment in Leaf Ink onto a White strip.

Adhere the Yellow panel over the embossed papers. Add the matted sentiment panel to complete the card.

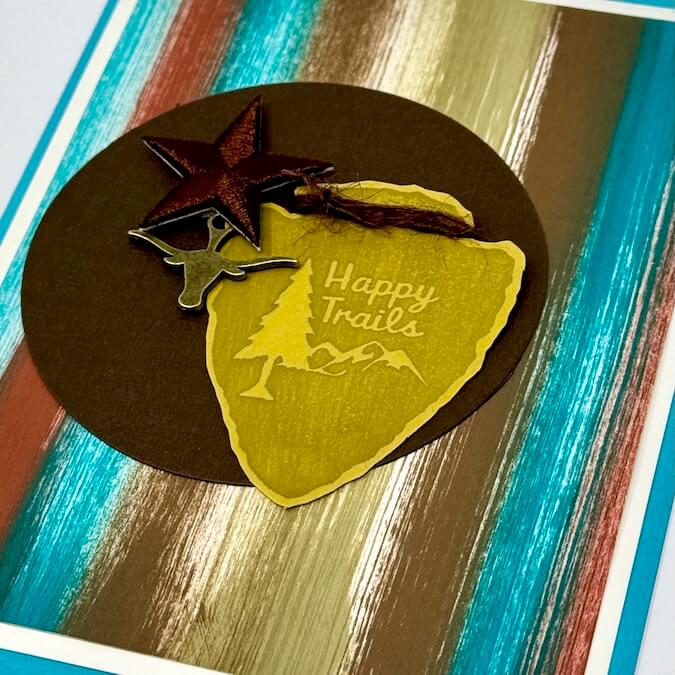
Card 7 - 3.5x8.5 Slimline

Stamp the three trees onto a White scrap with Spruce, Moss, and Leaf Inks.

Fussy cut the trees and color with an alcohol marker.

Stamp the sentiment on a White die cut circle. Nest the circle onto the Blue scalloped circle reserved from Card 1.

Add the YOU'VE GOT MAIL sentiment to a Red panel with Red Ink.

Wrap the end of the Red panel with a yellow cord. Add long strips of foam tape to the back of the panel, remove the backing, and adhere over a Blue mat and folded Yellow card base.

Tuck the edge of the sentiment under the cord. Adhere the trees to either side of it to complete the card.

We'd love to see how you're using your Harbor Town stamps. We invite you to share your finished artwork on our Facebook Chat Group! Not a member of the group yet? Simply answer a few questions and we'll get your request processed in no time!
Harbor Town Stamps

$19.25
Our premium clear photopolymer stamps are ready to use; no prep is required. The stamp sheet measures 6x8" and includes individual eleven images and phrases. Deeply etched for high-quality impressions Clear substrate for easy positioning and accurate stamping Non-yellowing and… Read More
Harbor Town Pack of Panels
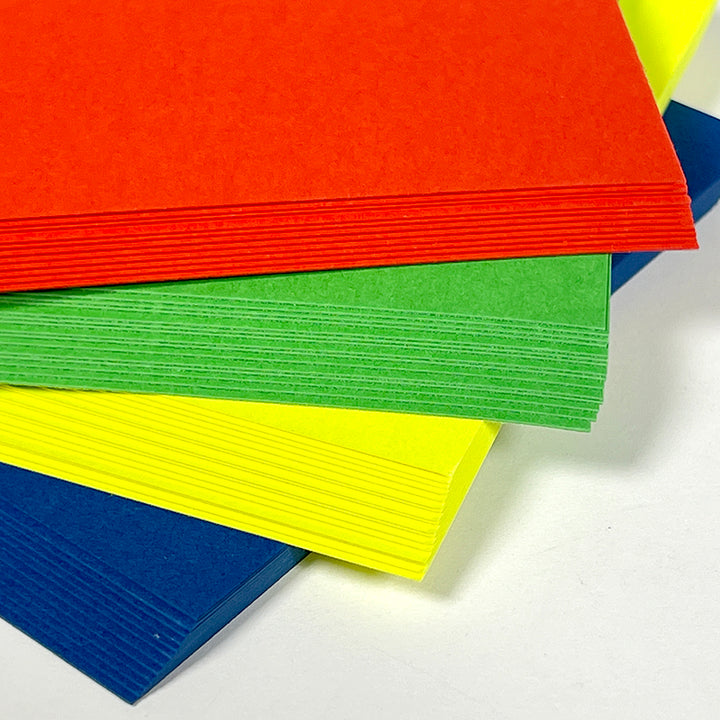
$6.95
A 6-8 ounce pack of premium kit papers from the monthly collection, approximately 4x6” in size. Great for use with die-cutting machines, as card panels, for creating page accents, and more!… Read More
CS Hybrid Ink Pads
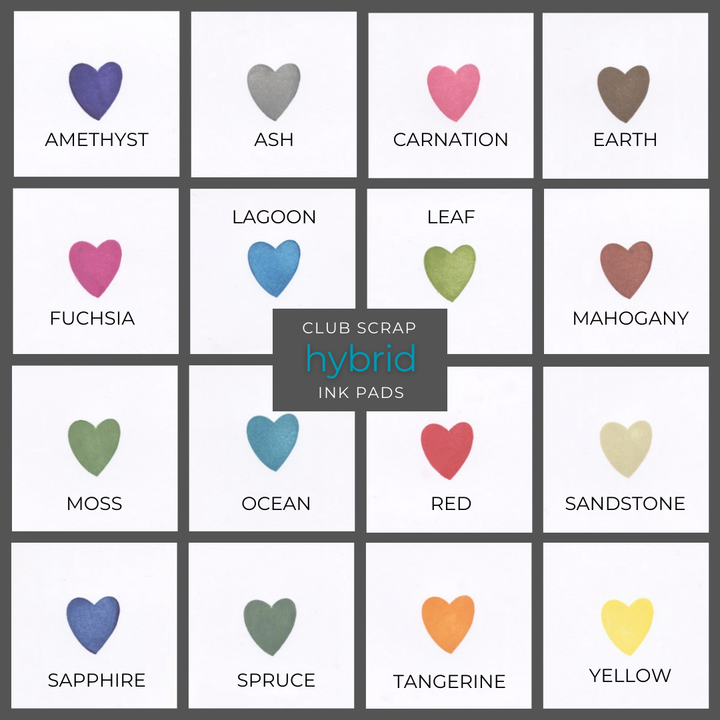
$6.35
Exclusively Club Scrap®, this hybrid craft ink combines the most exceptional ingredients of both pigments and dyes for a fine, crisp, fast-drying image! Don't forget to stock up on the coordinating re-inkers. Each ink pad sold separately. Please select the… Read More
White Pigment Ink Pad
$7.20
Club Scrap's pigment craft ink offers an exceptional formula, providing for multi-surface versatility as well as remarkable detail when embossing. The bright white ink loaded into this nice 'n juicy pad will last a long time. Re-inkers also sold separately.… Read More
CS Watermark Ink Pad

$6.40
This clear ink creates a "watermark" effect on all kinds of papers. Ideal for use with embossing powders and for resist techniques. Create watermark or light shadow images on uncoated card stock Use for Batik-like dye ink resist effects on… Read More