
I recently carved out some time to play with my Gelli Arts Printing Plate and created a stack of colorful backgrounds.

Then I began thinking about the Irresistible UM Stamp set. Could I use some of the fun floral artwork to my advantage? Eliminating certain groups of petals and shapes with a craft knife would allow my Gel Prints to peek through. Follow these steps to create this set of cards.

Generously cover the floral print stamp with India Ink.

Lay a 4.25x5.5" white panel onto the stamp and press firmly to ensure complete image transfer.

Take a second-generation impression by pressing a new white panel firmly onto the stamp without re-inking.

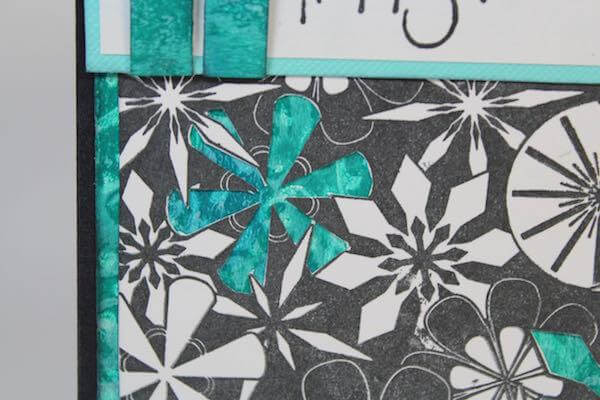
Carefully remove areas of flower petals using a very sharp craft knife.


Choose two gel prints created with the Tin Tiles embossing folder that work well when nested behind the cut panels.


Trim the first-generation impression to the edge of the image and layer with 4x5.25" gel print panel. Attach to 50s Kitchen Black A2 (4.25x5.5") card base.

Cut the second-generation panel to 4x5.25", leaving a 1/8" white border around the image. Adhere to Lock and Key Teal A2 (4.25x5.5") card base.

Adhere stamped sentiments nested with coordinating papers to complete each of the cards.
Take a peek at your stamps! What other sets would work well with this technique? Share your thoughts in the comments below.
 Julie
Julie