
Create amazing backgrounds featuring deep rich colors and textures with the Galaxy Stamps.
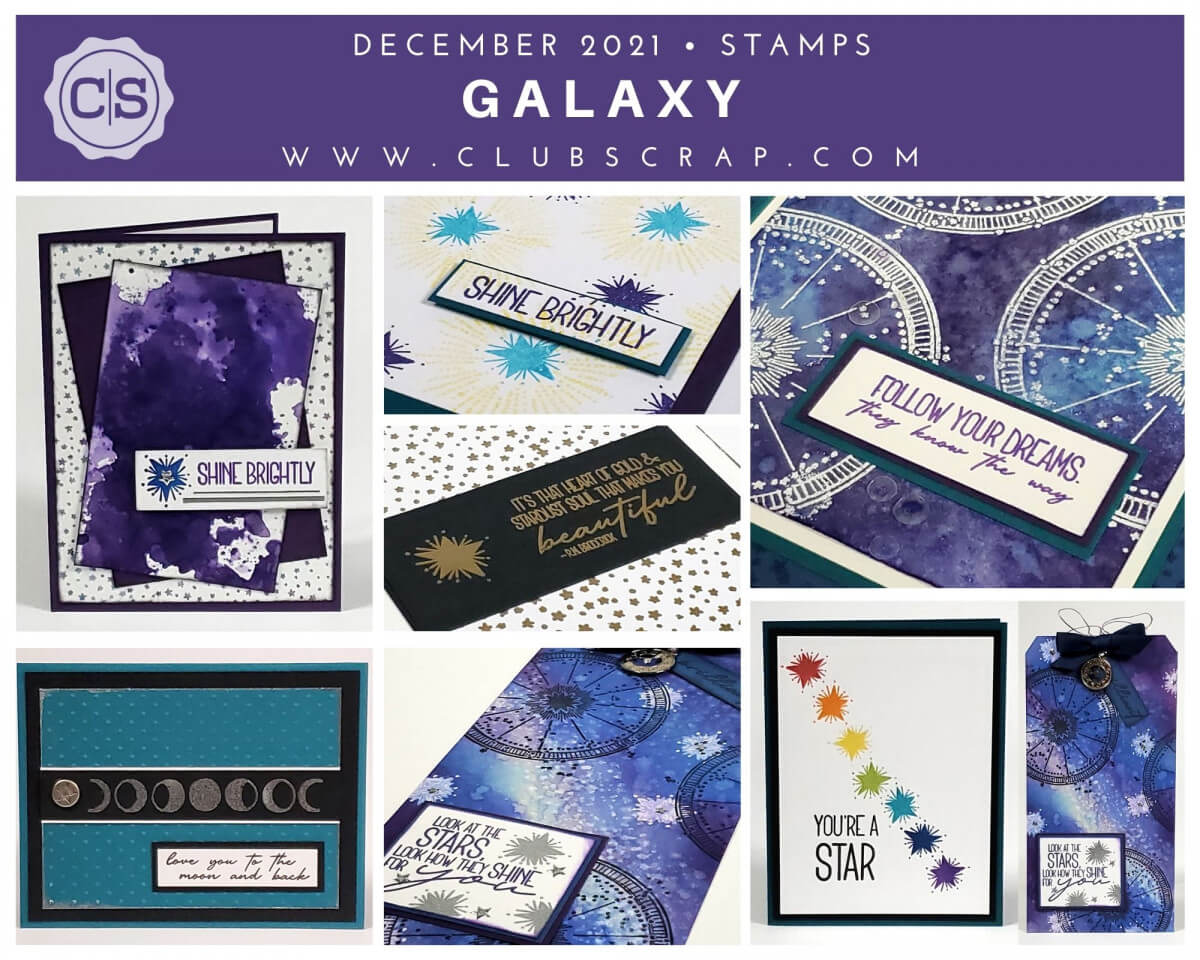
Galaxy Stamps

I chose to play with some tried and true techniques when making the cards and tag samples for the Galaxy collection. Sit back and enjoy the "out of this world" ideas shared below.
Card 1

Add a combination of Sapphire and Amethyst Hybrid ink to the tiny star image; stamp repeatedly onto a white panel.

Spray Villainous Potion Distress Stain on a craft mat. Dip a white mixed media paper panel into the wet medium to create a mottled effect.

Layer the panels onto the card base at alternating angles to add interest. Stamp the sentiment in Amethyst ink. Ensure the sentiment is aligned with the bottom of the card using the grid ruler as a guide.


Card 2

Stamp the tiny stars in Embossing Ink. Sprinkle with gold embossing powder and heat set. Repeat the gold embossing with the sentiment and star. Distress the edges of the white card base with Embossing ink. Dip the perimeter of the card into the gold powder and heat set. I love how it makes the white card pop!

Card 3

Add the star burst image to create a halo effect in Yellow Hybrid ink. Stamp a single star in the center of each yellow halo using Ocean and Amethyst Inks. Use Amethyst ink to stamp the sentiment and attach it to the card using Foam Adhesive Circles.

Card 4

Stamp the moon phases image onto a black strip with Embossing Ink. Sprinkle with Silver powder and heat set to melt.

Add Swiss dots to the Teal panel with an embossing folder. Dip the edges of the panel into embossing ink, then into silver EP. Heat set to melt.


Card 5

Stamp the single star multiple times with Red, Tangerine, Yellow, Leaf, Ocean, Sapphire, and Amethyst inks to create a rainbow strand.


Card 6

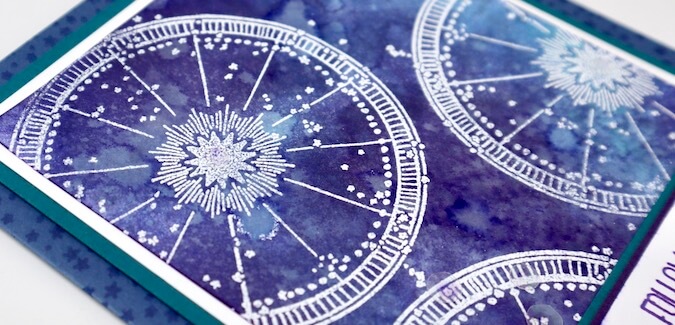
Spray a white panel with Tumbled Glass and Villainous Potion Distress Stains. Flick large water drops onto the dried panel and dab with a paper towel to "lift" some of the stain. Use a heat gun to speed the drying process.

Wipe the panel with an anti-static pad. Stamp the large zodiac wheel image on to the background several times in Embossing Ink. Cover the images with white embossing powder, remove excess and heat set to melt.

Add sparkle with clear sequins applied with Bookbinding Glue dispensed from a Needle-tipped applicator.

Use Sapphire ink to repeatedly stamp the tiny stars image along the perimeter of the Blue card base creating a tone on tone effect.


Jumbo Tag

Add color to a jumbo tag with a variety of Distress Inks, leaving a bit of white space diagonally near the center of the tag.

Add Salvaged Patina Distress Oxide to the background with a sponge applicator.

Flick water droplets over the inked tag and lay a paper towel over the wet tag to remove some of the ink.

Spray a small amount of Opaque White Stipple mist on a stamping block. Roll up the tiny stars image, dip lightly into the mist and stamp repeatedly along the ink-free area of the tag.

Add even more color to the background with Fuchsia Hybrid ink.

Dip the single star image in White acrylic paint and stamp randomly over the tag. Clean the stamp thoroughly with warm soapy water.

Stamp the large zodiac constellation circle image in India Ink. Mat the stamped sentiment with paper from the Galaxy Pack of Panels. Embellish with Star Dazzles stickers.

Let's take a look at the completed tag.

I hope you are inspired to give some of these techniques a try. Happy Stamping!
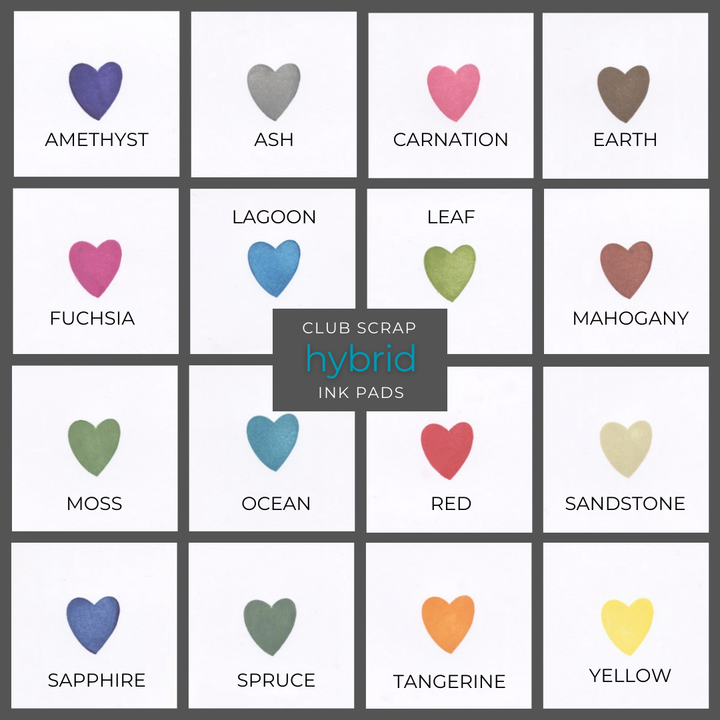
CS Hybrid Ink Pads
$6.35
Exclusively Club Scrap®, this hybrid craft ink combines the most exceptional ingredients of both pigments and dyes for a fine, crisp, fast-drying image! Don't forget to stock up on the coordinating re-inkers. Each ink pad sold separately. Please select the… Read More