
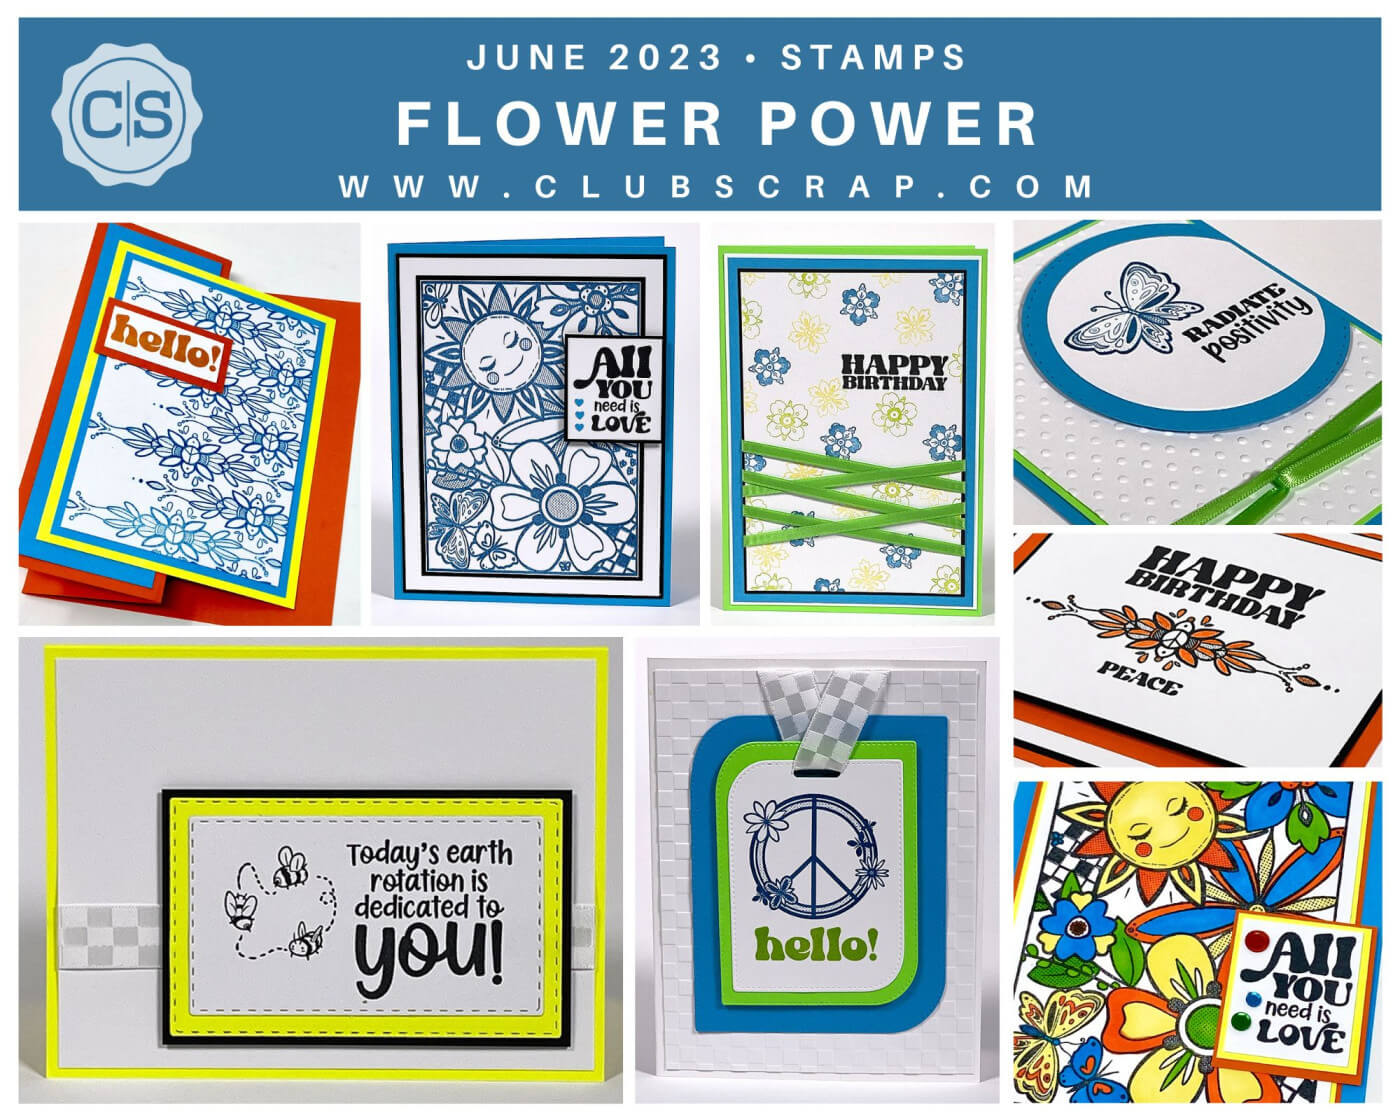
Create super-sweet cards with some simple techniques featuring the Flower Power Stamps. A special thanks to Tricia who joined me this month in making the samples. So many card making possibilities!
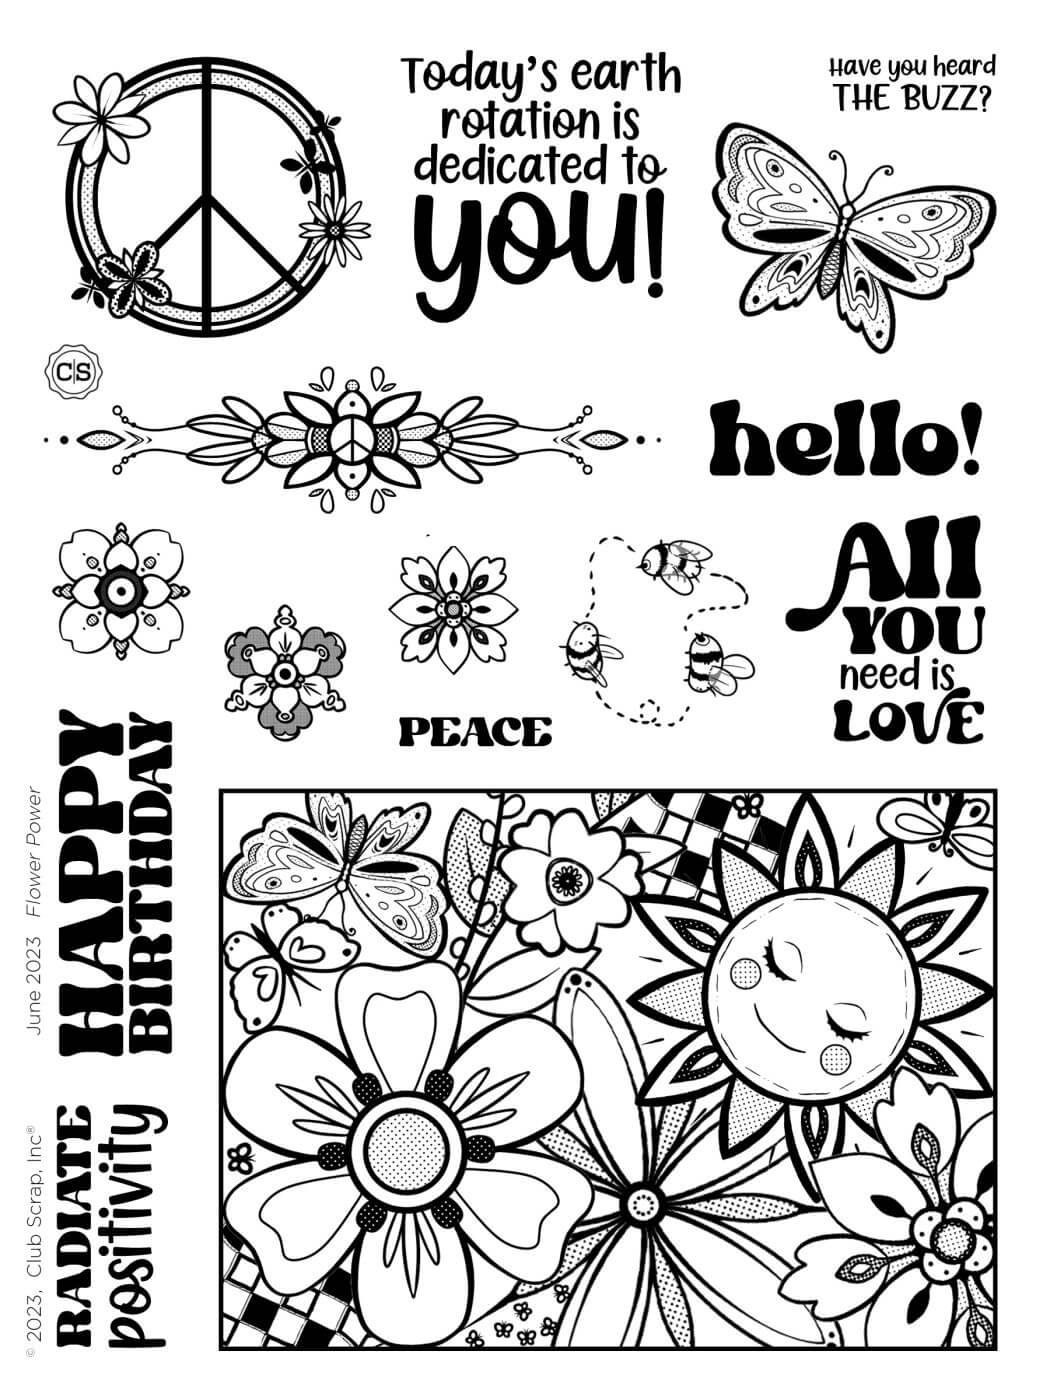
Flower Power Stamps
Card 1

Add the peace sign to the bottom of the panel in Lagoon ink. Stamp a second, third and fourth generation of the image above the first.

Complete the card with a stamped sentiment.

Card 2

Add the hello! sentiment at an angle on a white panel with Lagoon, Leaf, Yellow and Tangerine inks.

Add texture to the yellow panel with a Butterflies embossing folder.

Layer onto the front of a card; mat the strip with coordinating panels.

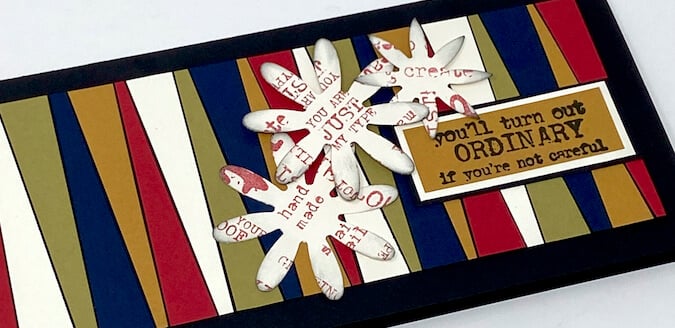
Card 3

Stamp a simple background with the flourish image on a white panel with Lagoon ink.

Add a sentiment in Tangerine to complete the card.

Card 4

Stamp the butterfly with Lagoon ink onto a Blue panel. Add flowers to the green panel with Leaf ink.

Adhere both panels to an Orange mat. Cover the seam with a strip of white paper.

Add the bees and sentiment to a white panel with India ink.

Nest the trimmed sentiment onto coordinating panels and adhere over the white strip to complete the card.

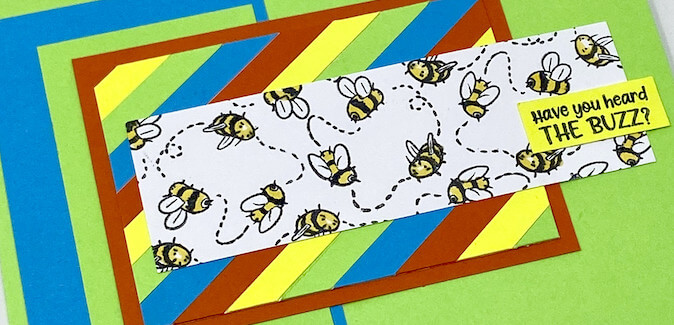
Card 5

Stamp the bees onto a white panel with India ink, making sure to rotate the stamp with each application. Color each bee with marker.

Make a fun striped panel with leftover paper scraps, by adhering 1/4" strips to a white panel on the diagonal. (I recommend attaching them with Bookbinding Glue dispensed from a Needle-tipped Applicator.)

Mat the striped panel with coordinating papers. Add a stamped sentiment to complete the card.

Card 6

Position the collage image onto the lid of a stamping platform. Stamp the image onto a white panel with Ash ink. (Leave the stamp on the platform.)

Color the image with coordinating markers.

Place the panel back into the stamping platform. Stamp over the colored image with India ink.

I just love how it makes the imagery pop!

Stamp the sentiment onto a white panel. Add sequins with Bookbinding Glue dispensed from a Needle-tipped Applicator.


Card 7

Divide a white panel into quadrants with 1/4" washi tape. Tip: Align the panel on Club Scrap's Grid Paper Pad, using the lines as a guide.

Mask off the first quadrant with a sticky note. Apply Yellow with an Ink Applicator Brush.

Continue to mask each quadrant in the same manner until each section is colored as desired.

Add stamped images to each area with India ink.

Apply Yellow ink to the top half of the sentiment and Tangerine to the bottom half to create a multi-toned effect.

Wrap the nested sentiment panels with black waxed thread; tie with a bow to complete the card.

I hope you enjoyed this tour of our stamped cards. If you are inspired by these ideas, please share your artwork with us on our Club Scrap Chat Group on Facebook. Not a member of the group yet? Simply answer a few questions and we will get your request accepted in no time.
To see more cards featuring Flower Power stamps, visit Tricia's blog post.
CS Hybrid Ink Pads
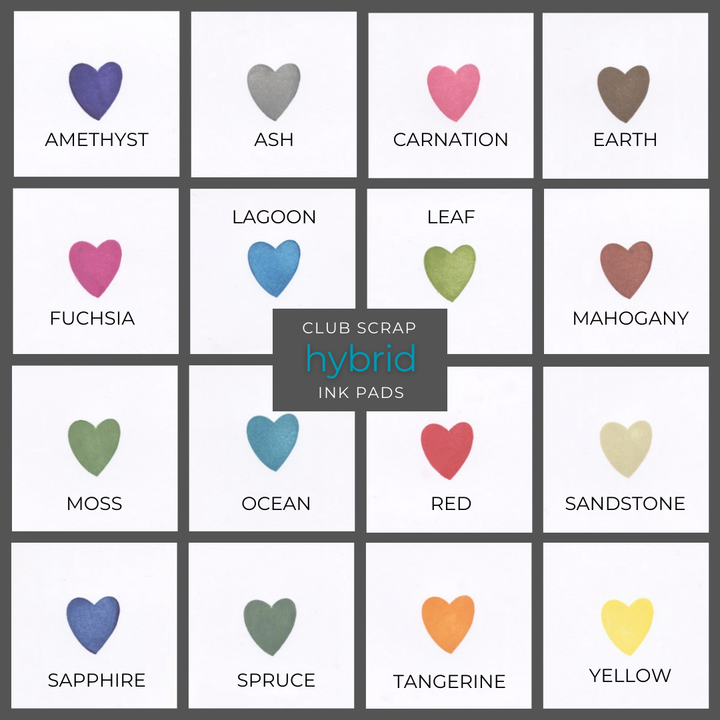
$6.35
Exclusively Club Scrap®, this hybrid craft ink combines the most exceptional ingredients of both pigments and dyes for a fine, crisp, fast-drying image! Don't forget to stock up on the coordinating re-inkers. Each ink pad sold separately. Please select the… Read More
India Ink Pad
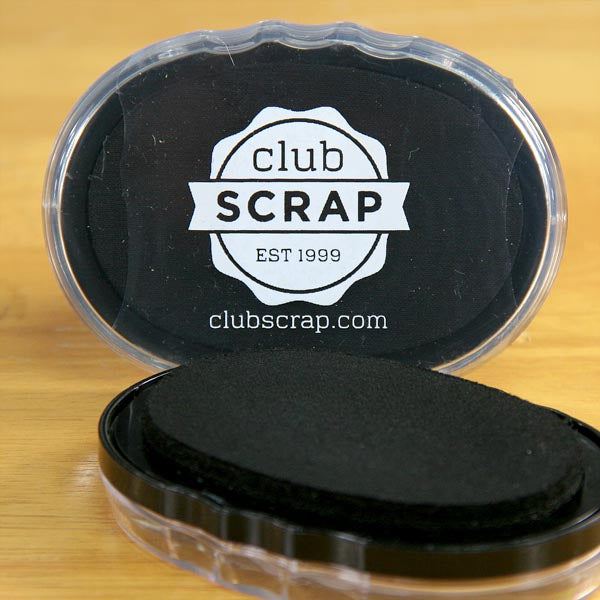
$7.50
Club Scrap's India Ink is a deep black, super-quick drying dye ink formula for use with watercolors, markers, stamping, scrapbooking and much more. We love how fast it dries so that you can get to work without a smudge!… Read More