
Create a set of Ever After Shaker Christmas cards featuring one of our fun formulas. Club Scrap offers a myriad of card making formulas it is often hard to choose which one to use!

Many times it is my paper selection that leads me to the correct choice. In this case, I had four 12x12 papers so Deluxe Card Formula #10 was a perfect fit! To replicate my cards, use the following paper assignments:
Paper A - Fun and Games Red
Paper B - Fun and Games Taupe Metallic
Paper C - Farmstand Dk. Green
Paper D - Fun and Games White

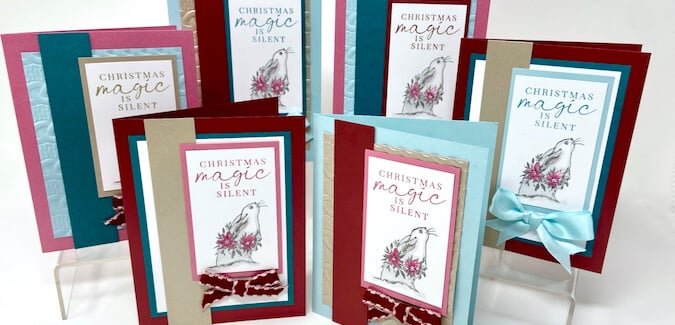
Ever After Shaker Christmas Cards
Purchase and download the Deluxe Card Formula #10. Trim the papers according to the detailed cutting instructions. Sort and distribute the papers into piles. Choose stamp images from Ever After and sentiments from Woodland Christmas to decorate the panels.

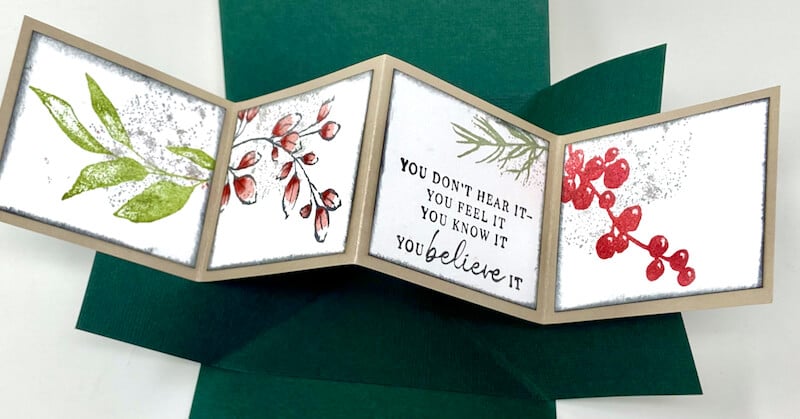
Select a sentiment that will fit inside each of the small squares. Position the stamp toward the top of each square to ensure it is legible once the shaker elements are placed inside.

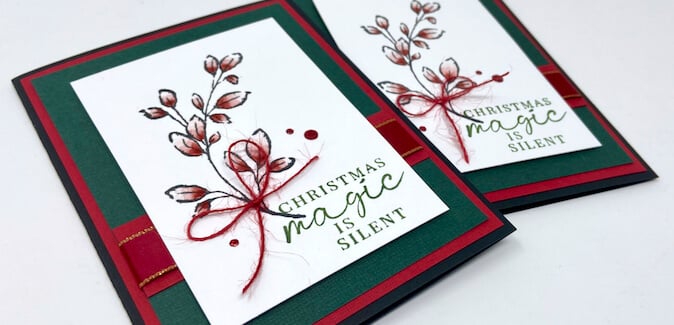
Add the twig images on the sentiment squares and embellish with Red Dazzle Dots from the Woodland Christmas Page kit.

Cut an opening for the shaker window with a 2x8" Acrylic Ruler, craft knife and cutting mat.

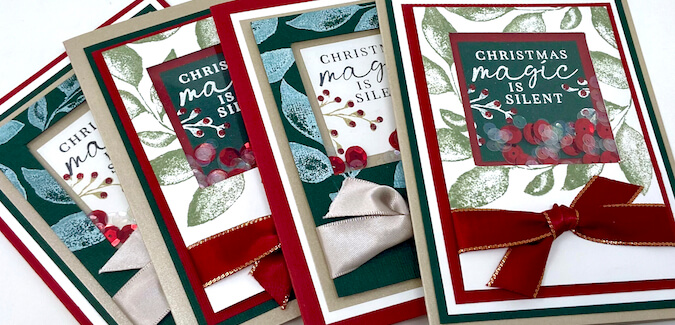
Stamp the white panels with the leaf stamp in Spruce and the green panels with White Pigment ink. Be sure to clean off the stamp when switching colors.


Run a thin line of Bookbinding Glue in a Needle-tipped Applicator around the outside of the opening. Lay a piece of acetate over the glue to complete the window.

Adhere the sentiment on the panel using the Acrylic ruler as a guide to ensure proper placement within the window opening. Repeat for the remaining panels.

Wrap a knotted ribbon around the bottom of the window panel. Add foam adhesive strips around the sentiment and along the back side of the window panel near the bottom.

Sprinkle a mix of sequins, beads, etc. into the center of the shaker area, over the sentiment square.

Remove the adhesive backing from the window panel and shaker frame. Align the window panel over the shaker elements and press to adhere.

Let's take a look at the finished cards.


Happy Christmas card making!
Deluxe Card Formula 10

$4.39
Make four 4.25 x 5.5" shaker cards from four sheets of paper and a few other basic supplies. So much more than a card sketch, our card formulas offer cutting and assembly instructions. Download includes one 2-page printable formula. Samples… Read More