
Create awesome artwork to make four cards with the Center Line Stamping technique. Sometimes referred to as a "one sheet wonder", the stamped paper is divided into four panels, perfectly-sized to adorn any card.

Center Line Stamping
Trim 8.5x11" Super Smooth White Paper horizontally at 10.5". Rotate and trim vertically at 8" (8x10.5" finished size). Locate the vertical and horizontal center of the sheet with an acrylic ruler and lightly mark each with a pencil.

Stamp a chosen image along the pencil lines with Hybrid Ink.

Continue to add images in coordinating colors until the desired result is achieved.

Place the stamped paper into a 12-inch paper trimmer and cut vertically at 4". Stack the 4x10.5 pieces and trim both horizontally at 5.25". The result is four 4x5.25" panels ready for card making!

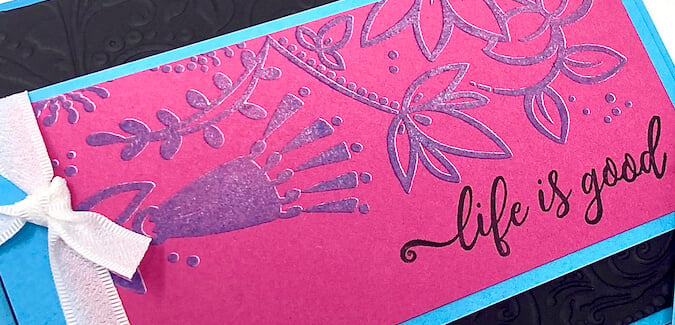
Flourish Cards - Julie
Decorate each card panel with sentiments from the Flourish Stamps and Earth Ink. Add ink "splatter" to select areas, if desired.

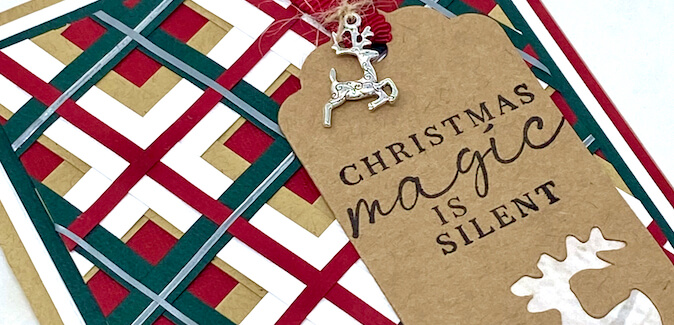
Whimsy Cards - Lisa

Lisa's panels feature Whimsy images stamped in White Pigment Ink on Kraft paper.
Once the stamped paper was trimmed into panels, she colored two with colored pencils...

...and the others with white pencil. Sentiments from Whimsy and Flourish stamps complete each card. What simply stunning results!

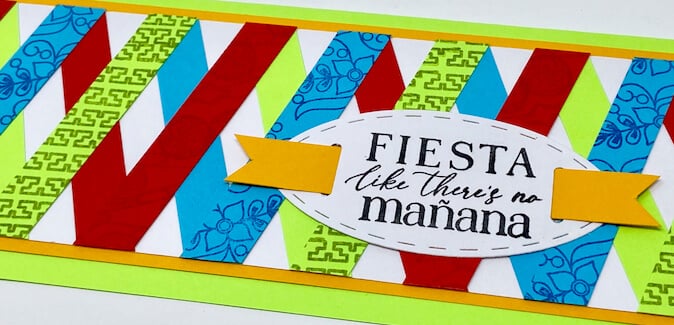
Mariachi Masked Cards - Julie
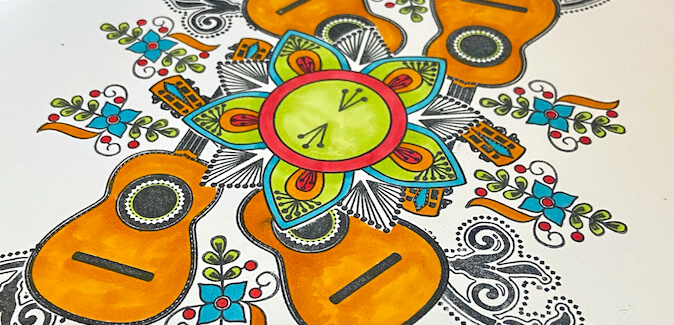
Kick this technique up a couple of notches with a bit of masking and detailed coloring with alcohol markers.

Stamp the large flower on Frisket Film* (a very thin, delicate masking product). Fussy cut the mask. Stamp the flower in India Ink along the center pencil mark of the 8x10.5". Remove the film from the backing sheet and cover the image with the mask. Stamp the guitar with India Ink, overlapping the masked flower image.
*Post-it note paper can be substituted for Frisket Film.

Repeat the steps above to create a mask for the guitar.

Cover the guitar with the mask.

Continue the stamping and masking process until the desired results are achieved. Carefully remove the center flower mask.

Add additional images as desired, filling in any empty spaces.

Select alcohol markers in shades that compliment the Mariachi collection; color the individual images. Once the coloring is complete, trim the paper into four panels.

Stamp a Mariachi sentiment on each panel.

Add sequins to each panel with Bookbinding Glue dispensed from a Needle-tipped Applicator.

Lisa and I had a lot of fun experimenting with this technique, and hope you'll consider giving it a try. The stamping possibilities are truly endless. If you do, please share your creations on the Club Scrap Chat Group on Facebook. Not a member of the group yet? Simply answer a few questions and we will get your request accepted in no time.
Lisa and Julie