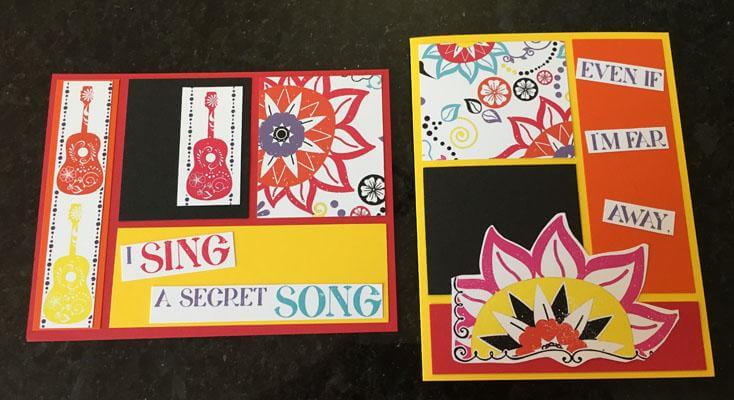
Did you know Dia de los Muertos is October 31 through November 2? To celebrate we've asked guest blogger, Janet Pirkle, to share the cards she created from the Dia de los Muertos page kit.
I was intrigued by the cards Karen made with the You Go Girl kit earlier this year. After reading her blog post, I could visualize turning any page kit into cards! Since I had purchased a few of the Dia de los Muertos page kits (Three, but who's counting?) I thought I would try to copy of her process and see how it turned out. Turns out it rocked! (But I'll let you be the judge of that.)
SPECIAL NOTE: Adding one 12x12 Celebrate Print yielded 30 cards from this kit. Be sure to cut everything and dry fit the pieces before adhering anything. This allows you to really maximize the use of all cut pieces and Cutaparts.
DIA DE LOS MUERTOS COLOR-BLOCKED CARDS
Trim one each of Orange, Red, Yellow, Black and one print according to Tricia’s Color-blocked Card Formula. Sort the pieces for all ten cards. Review the Cutaparts to see which sentiments and artwork fit best. Sometimes cropping out words or artwork from the Cutaparts fits the available space better.
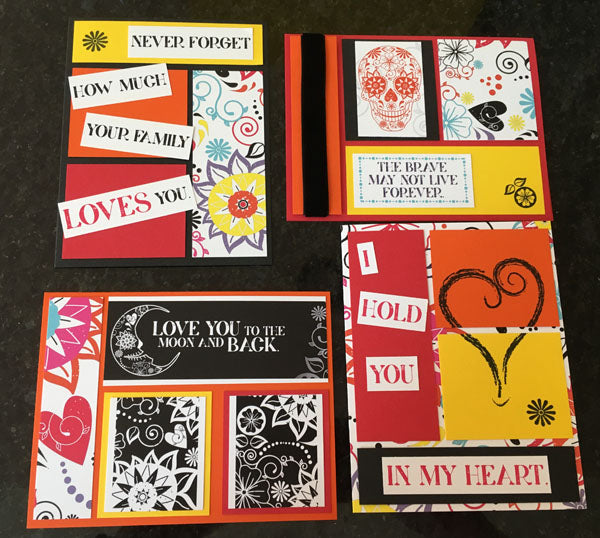
I love how most of the cards can be used for almost any occasion!

2 OF HEARTS (Vol. 2 Card Making Idea Deck)
Trim Black Print and Orange Plain according to instructions. Pay particular attention to how you place the print into the trimmer before cutting. I wanted to be sure to leave as much of the sugar skull design intact as possible.

5 OF SPADES (Vol. 2 Card Making Idea Deck)
Trim Black Print and Pink plain according to instructions. Be mindful of how you cut your black print as it can greatly alter the look of your cards.

I ended up not using all of the cut pieces because I didn’t want to cover these amazing prints!
ACE OF DIAMONDS (Vol. 2 Card Making Idea Deck)
Trim Yellow, Purple and White Print. (Follow Karen's tip to substitute a 12x12 instead of an 8.5x11.) The result is four trifold cards. (The tiny stamp is from Henna, but you could substitute any small stamp or embellishment on the square on the belly band.)

COLOR-BLOCKED CARDS (AGAIN!)
Trim the remaining plain papers: Orange, Black, Red, Yellow, along with a print from your stash. I used a Celebrate print. Selecting a an all-over print means you won't need to worry about cutting direction. Let's face it, by this time I was really tired!

I embellished each card with leftover Cutpart pieces and leftover card kit sentiments from my stash. You could also use stamps, etc.

I hope I've inspired you to try making cards from your page kits. Until then, "Love U Mas!"
Janet

