Create the look of wood with an embossing folder and the Alpine collection.

This project was inspired by genuine carved wood artwork I saw on Pinterest. I was instantly inspired to re-create it with this fabulous collection.
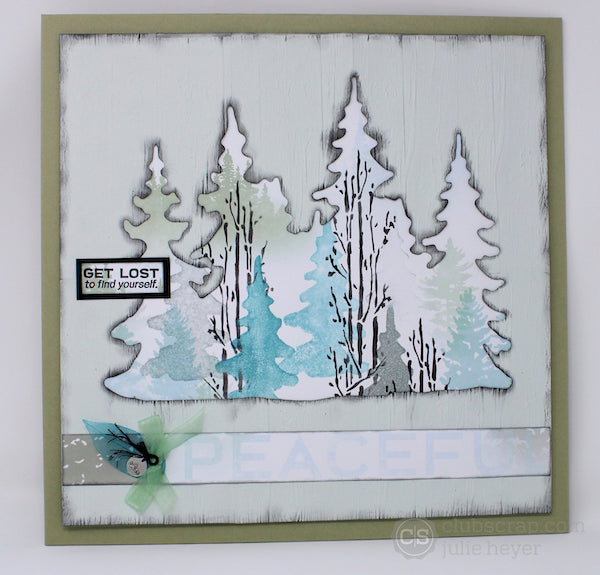
Alpine Faux Wood Wall Hanging
Select images from the Alpine Hybrid digital collection and resize to fit the project.

Import the images into a digital die cutting system workspace (I use the Brother Scan n Cut 2) to create the 12x12" cutting template.

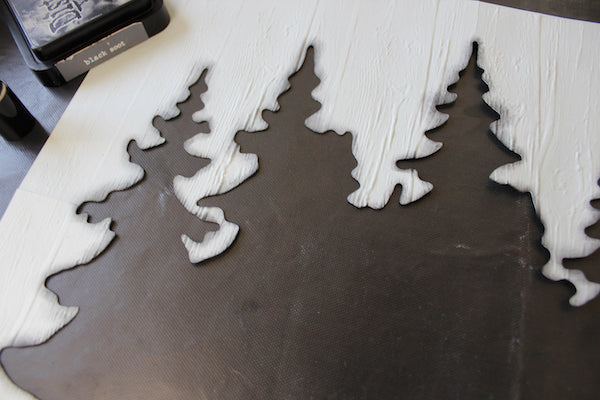
Load an Alpine Bright Sky 12x12" paper into the machine and cut the trees.


Trim this 12x12 sheet into smaller 4x6" pieces. Place each piece into an embossing folder to create the faux wood texture. Align the pieces back together and reattach with clear tape on the back of the sheet.

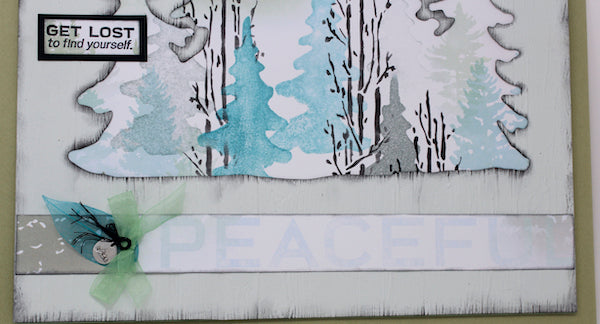
Place a 12x12 Alpine White print into the trimmer with the word PEACEFUL along the right side and trim at approximately 11-3/8 and 10-1/8 to isolate the word. Set the strip aside.

Trace a tree shape onto 1/8" black fun foam with the opening in the die cut faux wood as a guide.

Cut out the shape with scissors and mount onto a piece of book board to create a stamp.

Add color to the stamp with Iced Spruce and Broken China Distress Inks. Stamp the image onto scrap paper then mist the stamp lightly with water to reactivate the inks. Add these images to the larger section of White Print. Note: I used several generations of the images without adding more color to the tree simply by reactivating the ink with misted water.
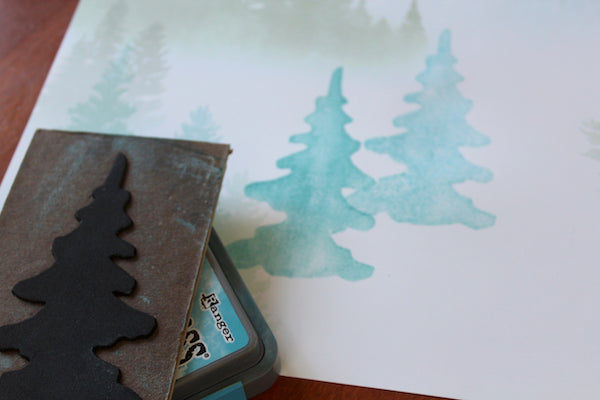
Continue to add trees with the Great Outdoors (2007) stencil and black ink.

Distress the edges of the faux wood die cut panel with black ink to enhance the texture of the paper.

Adhere this panel over the stamped White Print. Stamp the quote and layer onto a Pine mat.
Embellish the PEACEFUL strip with a skeleton leaf, mountain charm, and sheer ribbon tied in a bow. Adhere along the bottom of the project.
Adhere the piece to an 11-3/4 square mat board panel and mount onto a 13x13" covered book board frame.
Join me on my Cape Scrapper Blog for another fun faux wood project idea.
Best wishes for a crafty and peaceful end of year!